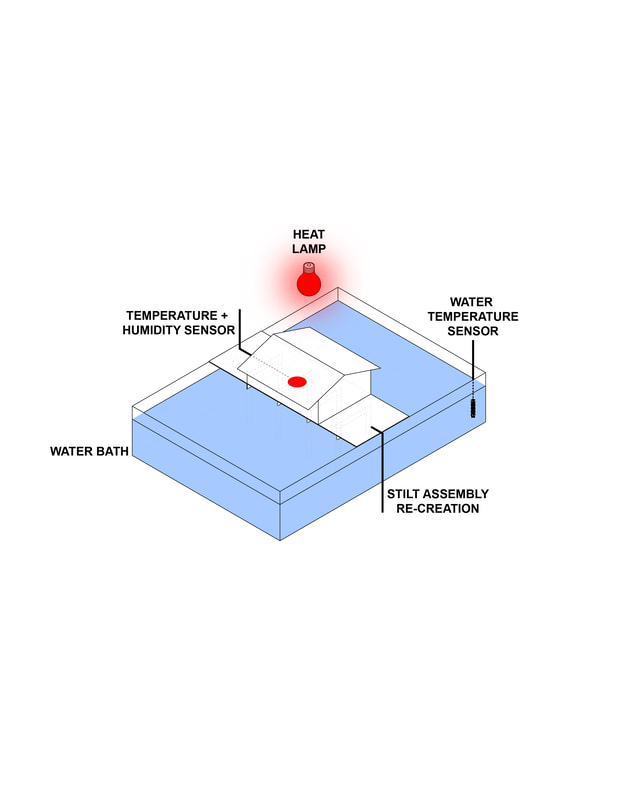
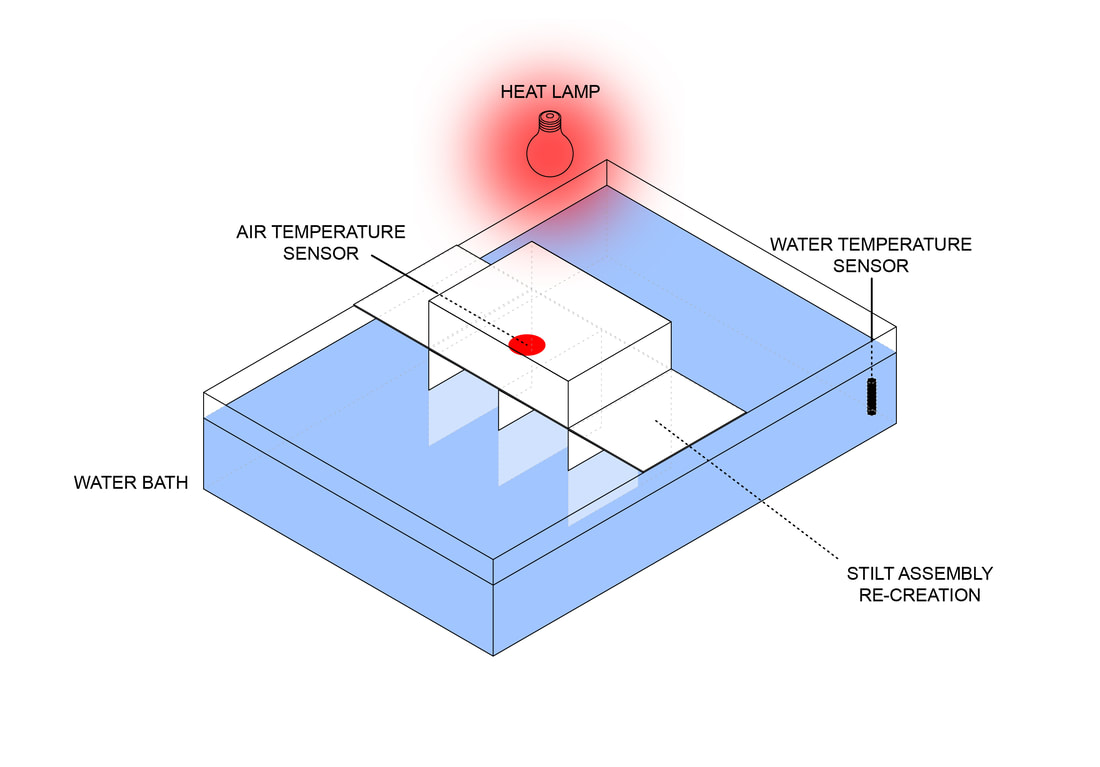
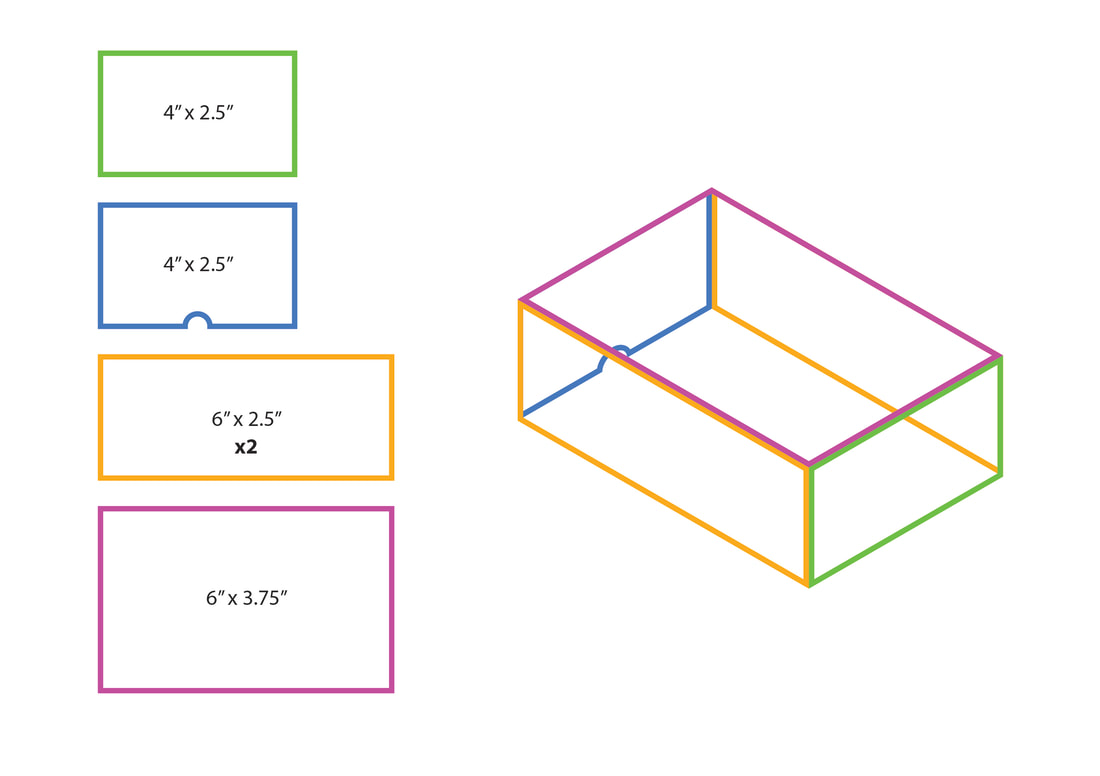
Enclosure Design (Preliminary)
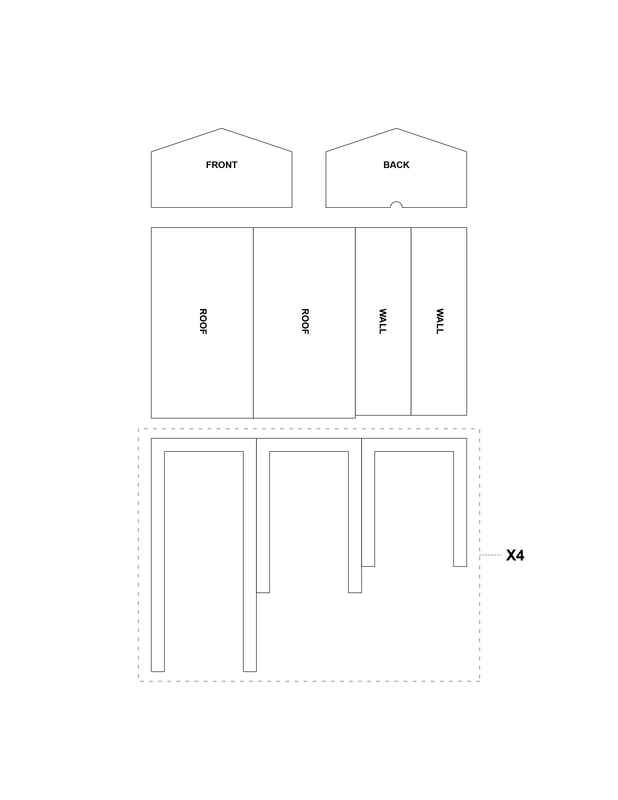
As there is no actual enclosure, fabrication is quite simple. All that needs to be modeled is the volume that will be heated and the platform / stilts that it will sit on above the water. These will both be cut from 1/16" mat board.
|
|
Once the pieces are cut, glue together the house and platform / stilts but DON'T glue the house to the platform. Leaving them separate will allow the temperature / humidity sensor to be inserted and removed. from the volume.
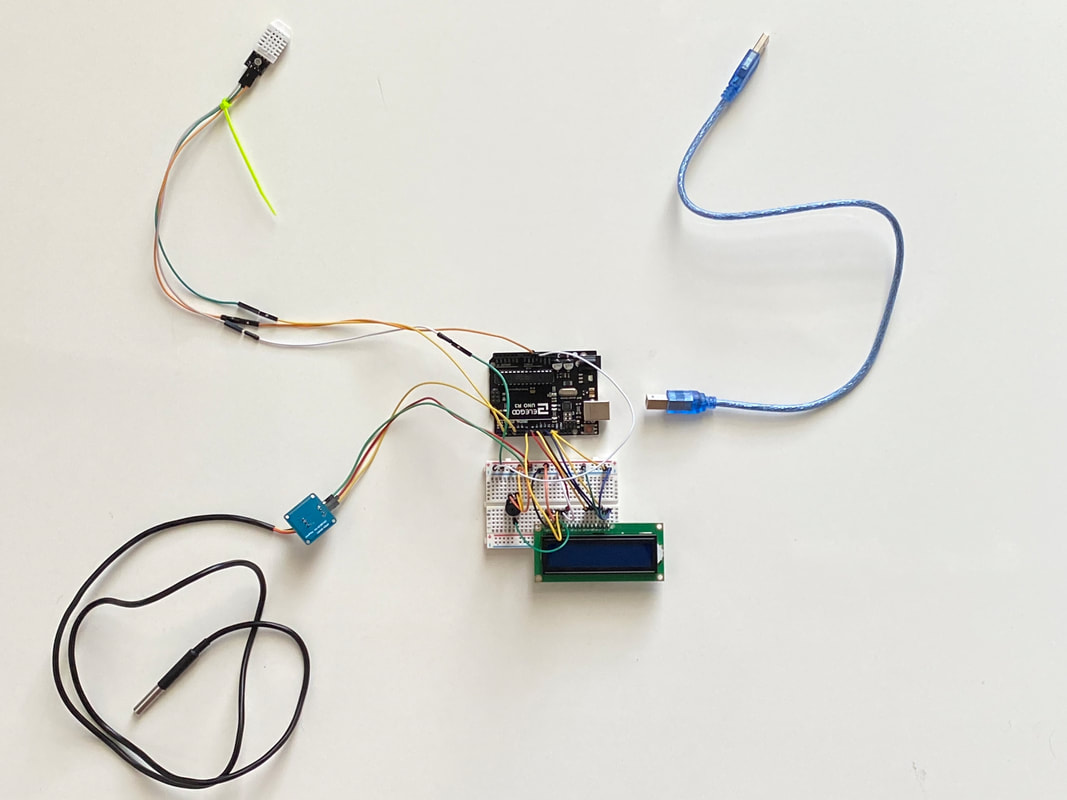
Controls (Electronics)
|
|
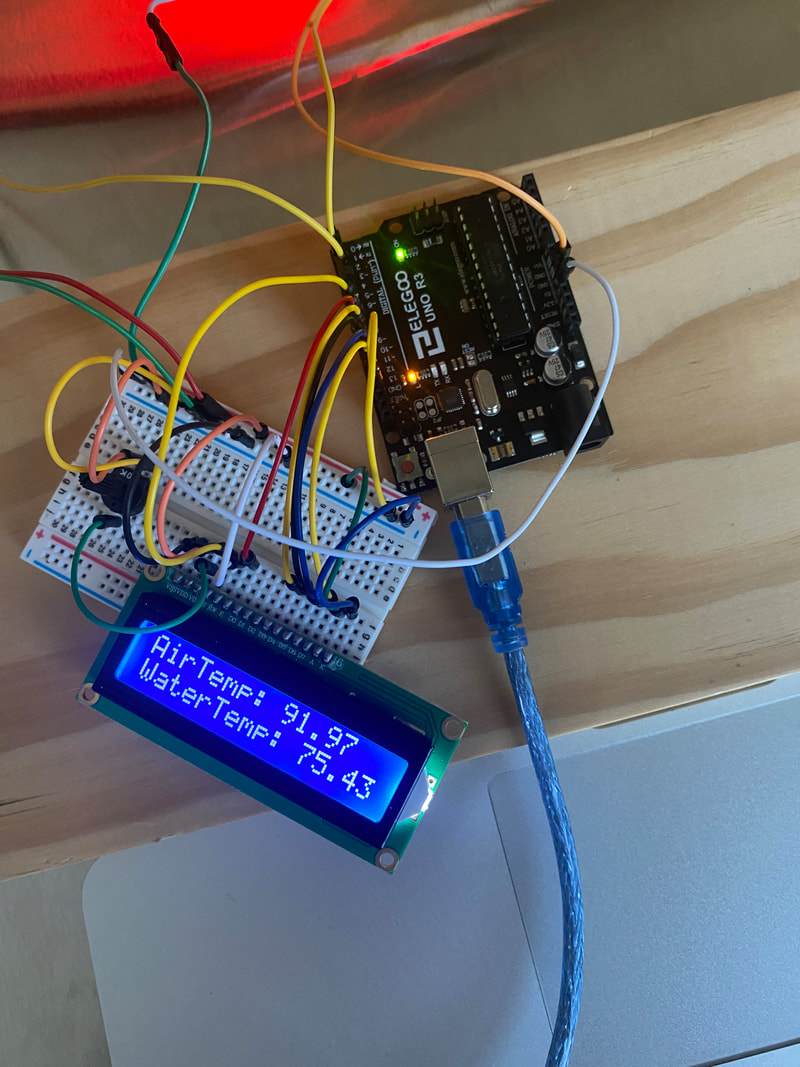
Arduino setup to record / display air and water temperature in serial monitor / LCD screen (respectively)
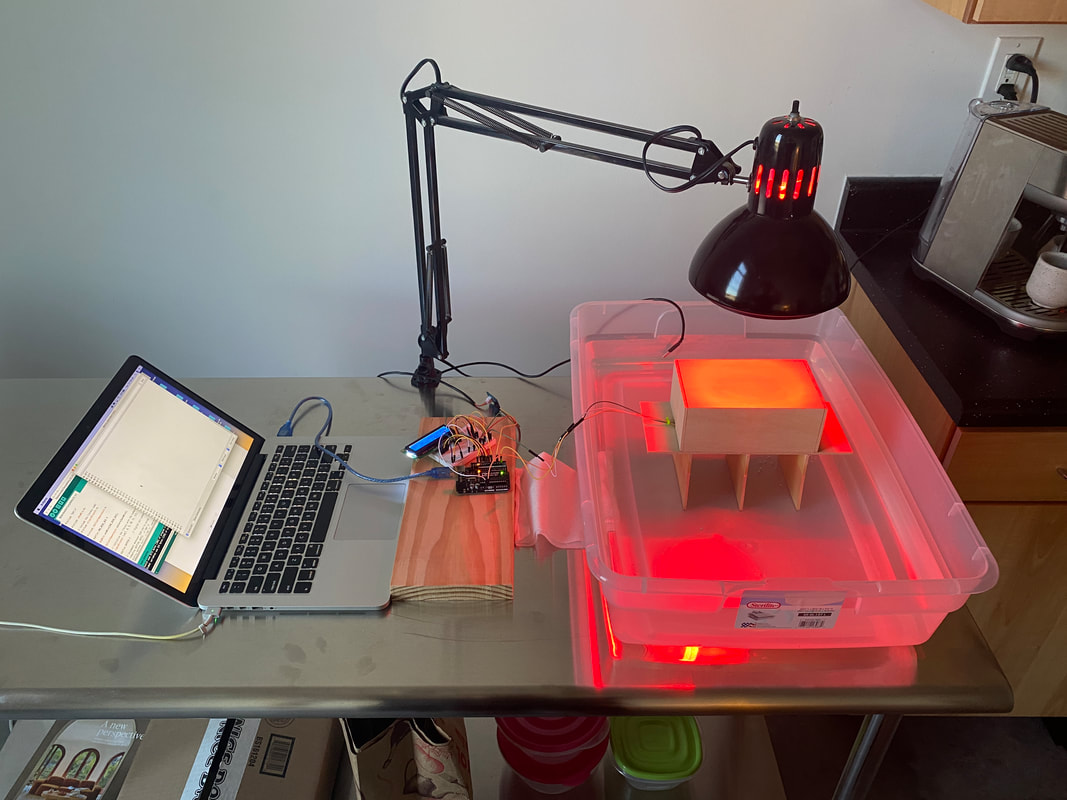
Assembly / Testing |
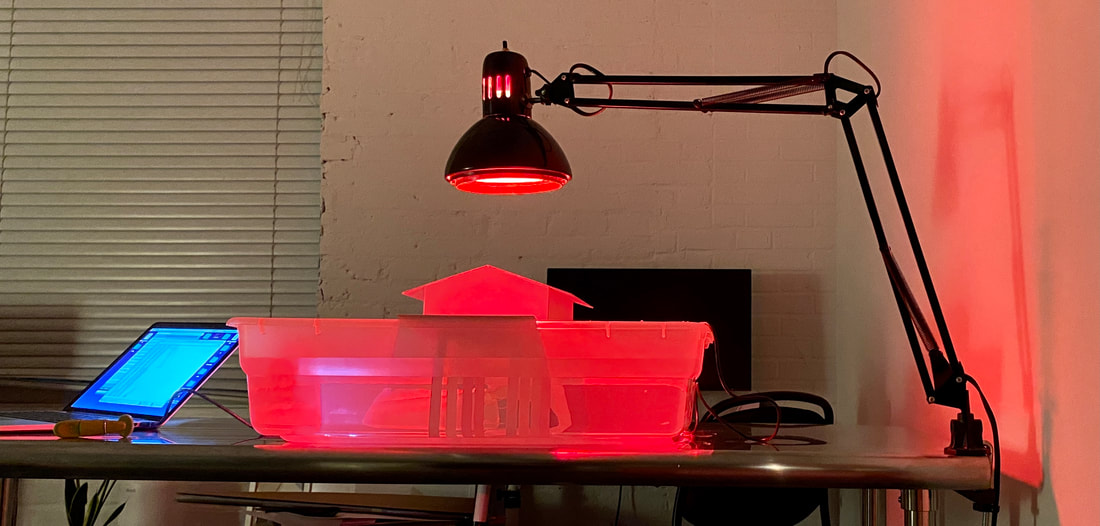
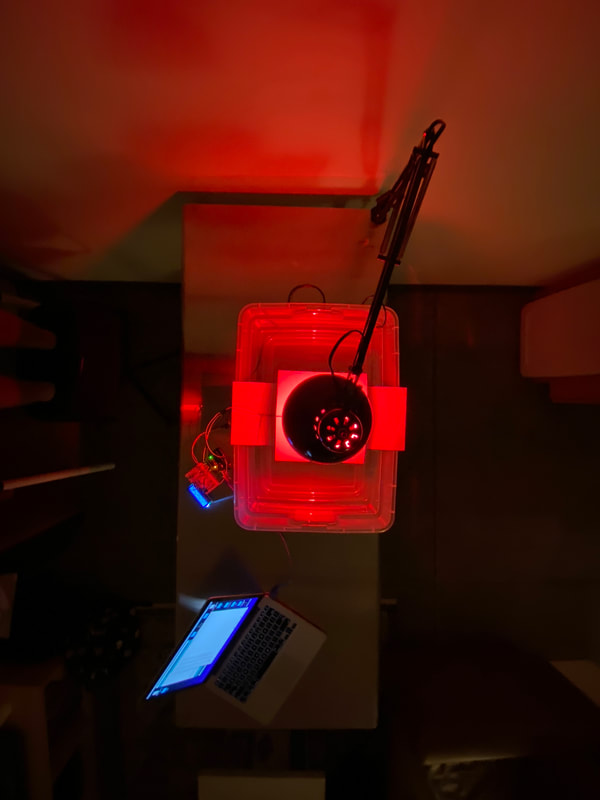
|
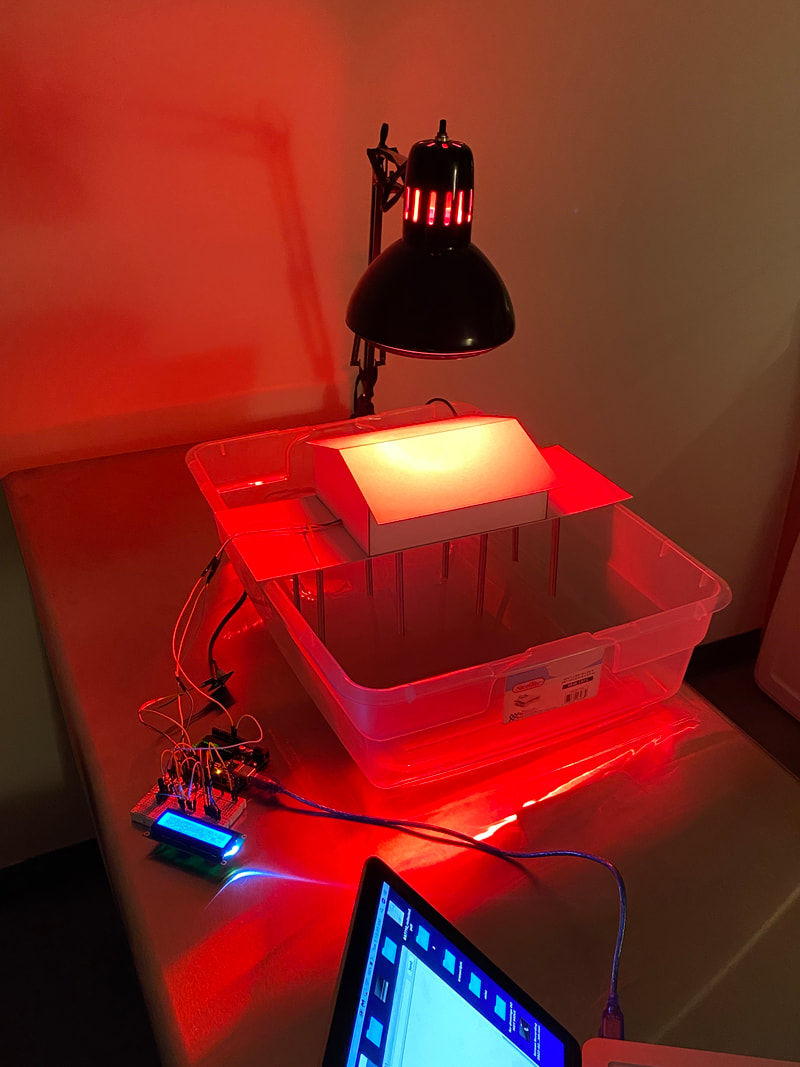
|
Preliminary Data
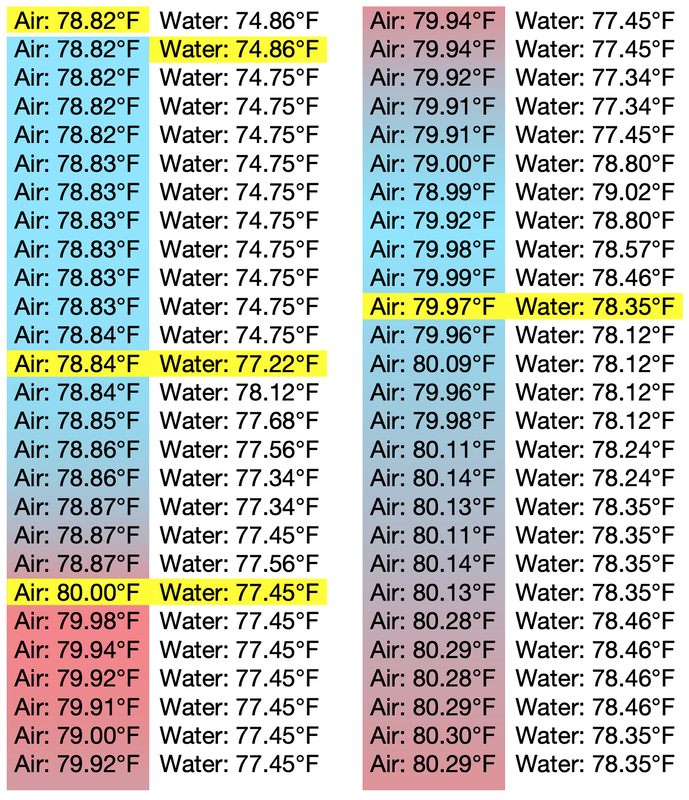
All sensors worked and collected data. The process, however, needed to be refined. Rather than slowly filling the tub with successive amounts of water over a long period (something I had not considered before starting the experiment), tub should be filled before the preconditioning phase so that the stilt assemblies can be easily transferred to the cooling "environment." This uneven filling and heating is illustrated in the color gradients and highlighting in the dataset above. Highlighted times are when water was being added and the gradients show how the heat changed between these additions.
The final version would ideally show a smooth transition and cooling as a result of having all the water present at the beginning of the experiment.
The final version would ideally show a smooth transition and cooling as a result of having all the water present at the beginning of the experiment.
Updates (Version 2)
Material for the stilt assembly has changed after the mat-board buckled in the water. The material is now 1/8" basswood cut to size to fabricate the volume and supports. The volume has also been simplified to eliminate air-flow variations and make the data more consistent.
The Arduino script has also been modified to display both air and water temperature, but only print the air temperature in the serial monitor. This makes it easier to input air temperature values into excel, while still allowing you to monitor the water temperature.
The Arduino script has also been modified to display both air and water temperature, but only print the air temperature in the serial monitor. This makes it easier to input air temperature values into excel, while still allowing you to monitor the water temperature.
Updates (Final Version)
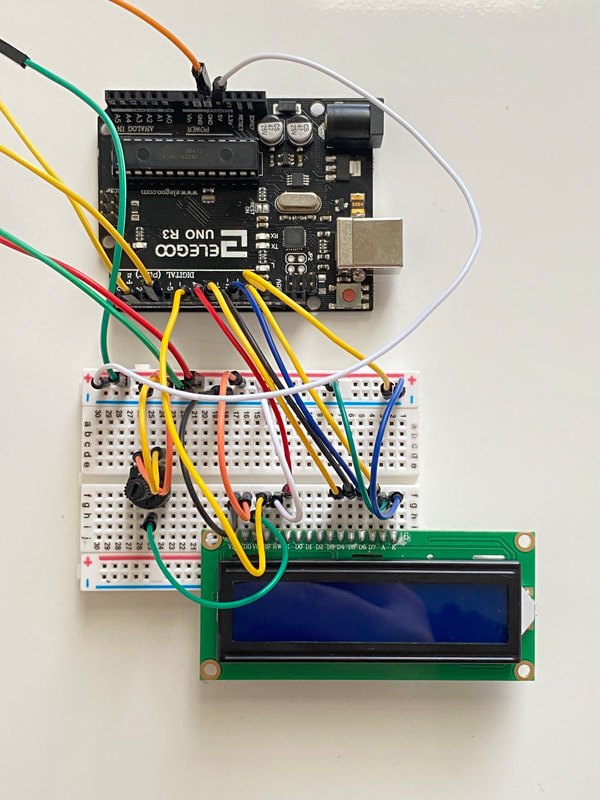
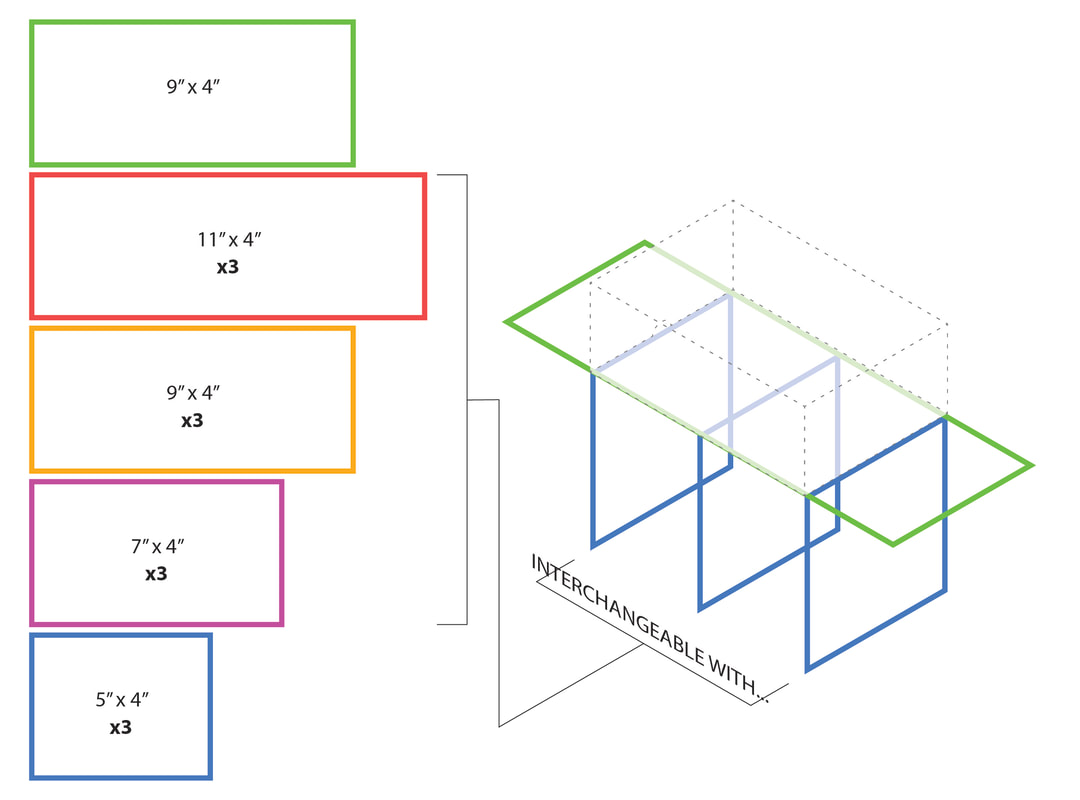
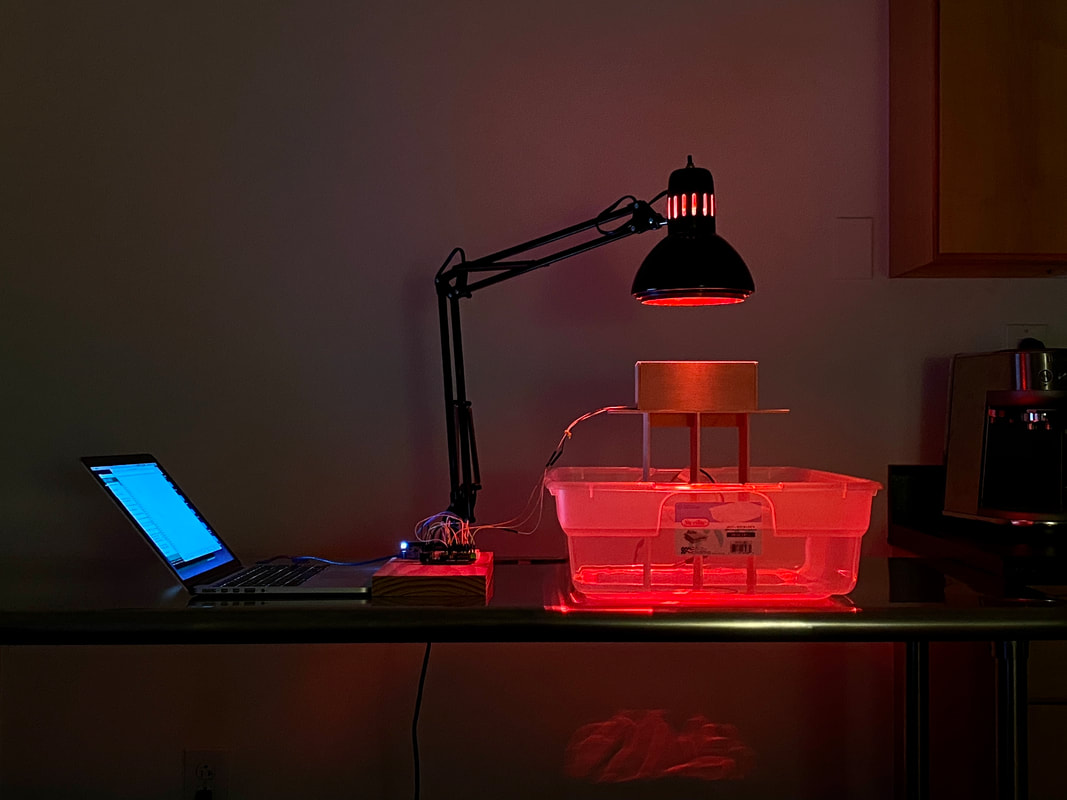
Construction material has been switched over fully to basswood as indicated previously. Stilts have been reduced to planes that sit in the water as opposed to thinner legs. This reduction in resolution sped up the fabrication of the different sized "stilts" and made it easier to produce them for testing. "Stilts" have been cut at 5", 7", 9", and 11" and can be glued / pulled off of the plinth that the heated volume rests on in the tests. The templates / assembly guides for these pieces are included below, along with an in-progress shot of the testing and LCD feedback.
|
|