Electronics and Controls - Part I
|
Let's begin with a personal story.
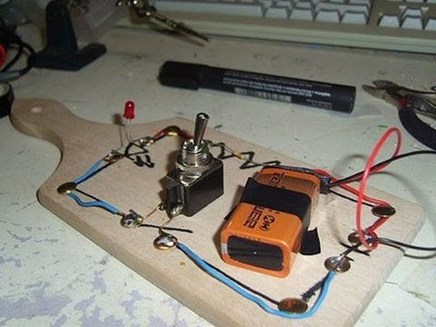
This is a picture of me from my third semester of graduate school, doing work for Neil Gershenfeld's infamous class, How to Make [Almost] Anything. We had just just learned to design circuits, mill and stuff (solder) our boards, and connect input output devices. I began with absolutely ZERO knowledge of circuits or any sort of electrical design. In fact, I tended to avoid all things computer-related. This photo captures the moment that my temperature/humidity sensor began reading data (after days of struggle). In the scheme of things, this was a relatively minor achievement, but it is truly one of the most meaningful achievements in my life thus far. It proved that I, a 'technically-illiterate person', was capable of controlling the world around me. And yes, I was crying. I'm certainly still a novice, but this feeling of empowerment is something that I hope to pass along to my students. If I can do it, anyone can... seriously. Furthermore. Arduino has made it even easier to control your environment. The board is predesigned, preprogrammed, and completely open source. My favorite part is the community of users willing to share their ideas, process and problems. It's an incredible community to be a part of. |
Arduino
There's really no need to mill and stuff your own boards anymore. Arduino offers easy-to-use hardware and software for people interested in prototyping ideas. The Arduino Uno utilizes Atmel’s low-power 8-bit microcontroller and Arduino IDE (Integrated Development Environment) for programming, which runs on all major operating systems. Arduino also has a large following of online users that share code and libraries. It's simple, inexpensive, cross-platform and open source. And most importantly, no experience needed. “From idea to physical project, for nontechnical people”
But first... let's learn the basics.
But first... let's learn the basics.
Electricity is a form of energy that involves the movement or storage of charges. It is the phenomenon that occurs when charges are pushed or forced to move through a specific path.
Remember, electrons have a negative charge, protons positive, and neutrons neutral. Charges move when there is an electrical force that acts on them and a path for the charges to move along. In the same way that heat moves from hot to cold (high to low pressure), Electricity moves when a force is created by electrical potential difference (voltage).
Remember, electrons have a negative charge, protons positive, and neutrons neutral. Charges move when there is an electrical force that acts on them and a path for the charges to move along. In the same way that heat moves from hot to cold (high to low pressure), Electricity moves when a force is created by electrical potential difference (voltage).
Alternating Current (AC)
|
Direct Current (DC)
|
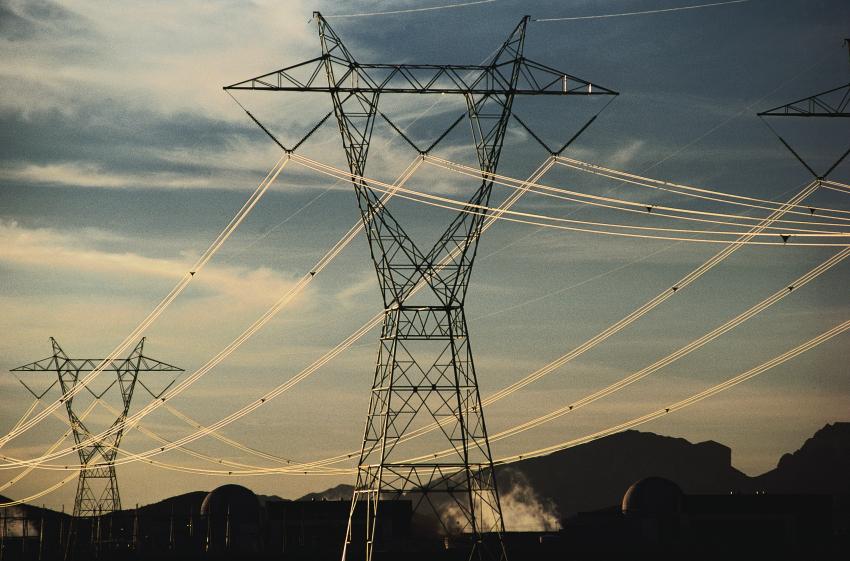
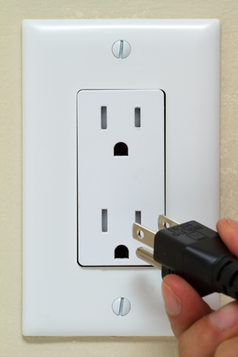
Electricity is delivered to us in two forms. Alternating current (AC) is the kind of electricity in the power lines. It's great for power generation, transmitting power over long distances and driving large devices like motors and heaters. DC power (direct current) is what we commonly see in household applications - it's converted from the power grid via a transformer on site. Batteries also use DC power. All of our projects this semester will use DC power.
Aside from lightning, electric shocks, and a few other opportunities, it is difficult to visualize electricity. However, it's helpful to understand electrical flow by comparing it to water, since it works much in the same way.
Aside from lightning, electric shocks, and a few other opportunities, it is difficult to visualize electricity. However, it's helpful to understand electrical flow by comparing it to water, since it works much in the same way.
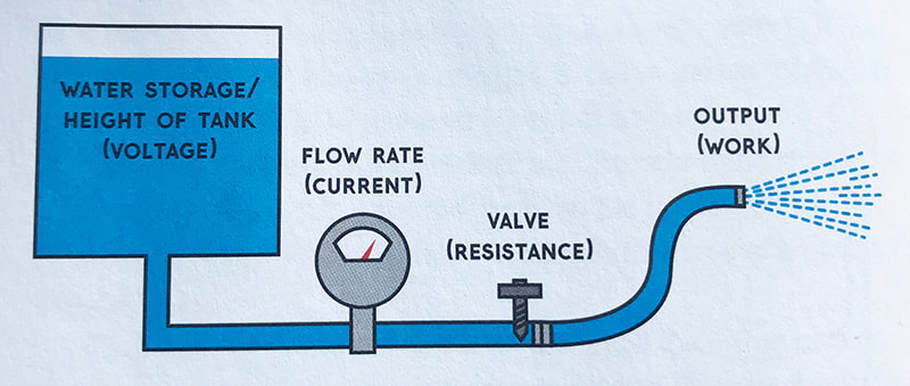
Image Source: Huang and Runberg, 2017
Current: the movement and transfer of charges (Amperes (A) or milliamperes (mA))
Voltage: what ultimately causes charges to move (V)
Imagine water flowing through a pipe or a hose. The water molecules moving through the hose represent current. As with water pipes and mechanical ducts, electrical circuits can face resistance. Higher resistance leads to lower flow through the pipe, duct or circuit. The water pressure, ie the rate at which the water flows, represents voltage. As water pressure increases, flow also increases. When additional voltage is added to a circuit, the power increases, as well as current. In the above example, water ultimately sprays out of the hose. In an electrical circuit we want to change the electricity that's flowed through the circuit into some other form of useful energy to do work - for example, illuminating a light, rotating a motor, or sounding a buzzer.
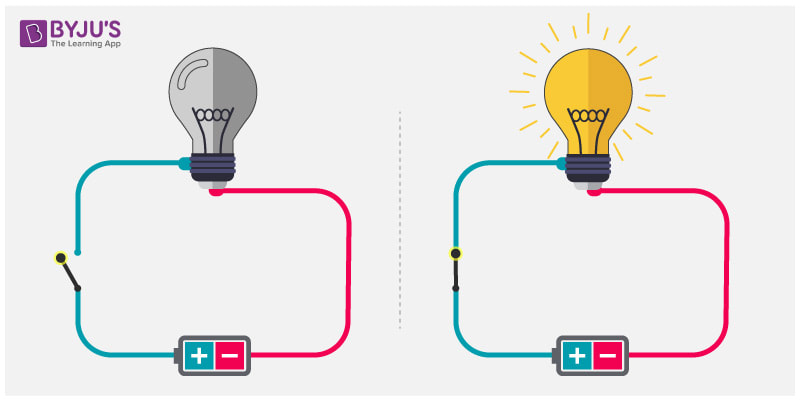
Charges need a path to follow in order to flow, and that path needs to be made out of a material that is conductive (such as copper). They also need an electrical pressure differential. Electricity flows from positive to negative (high to low). The image above left shows a simple circuit - a battery, a switch, and a light bulb. On the left side, the the switch is up and the circuit is not complete, so the bulb does not illuminate. On the right side, the switch is down, completing the circuit and illuminating the bulb. This is an important part of working with Arduino's. While it may seem obvious that we need to connect the circuit to power (VCC), we also need to close the loop by connecting it to ground as well (GND). |
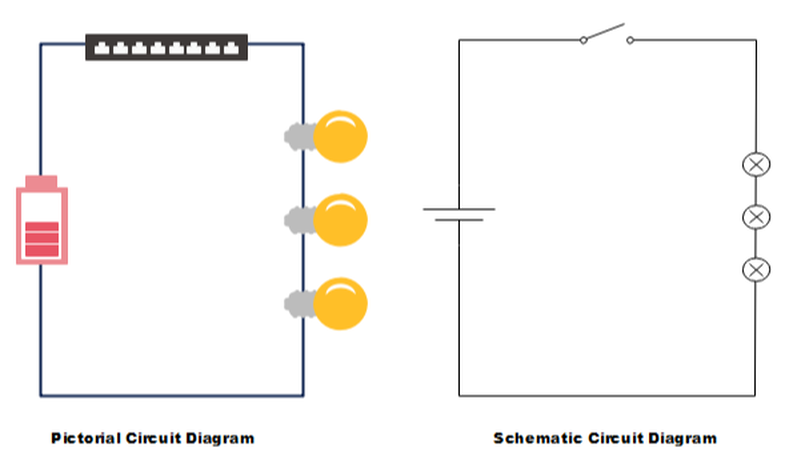
Image Source: www.edrawsoft.com 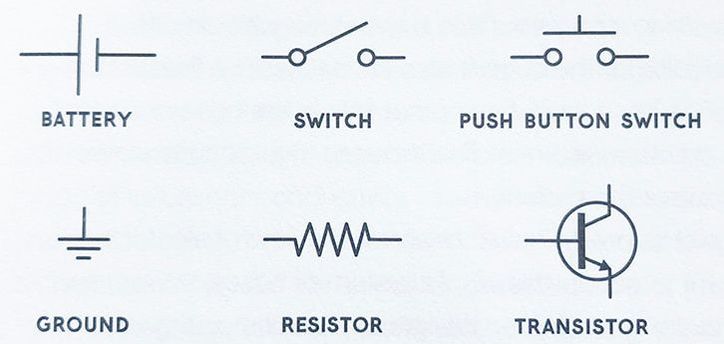
Image Source: Huang and Runberg, 2017
|
Often, circuits are shown using symbols instead of images (as above). The image above right shows the same series circuit in two different ways. The schematic image on the right is what you'll typically see when looking at circuits with each component having its own unique symbol. These drawings are also called wiring diagrams or circuit blueprints. These symbols typically follow the format established by the Institute of Electrical and Electronics Engineers (IEEE). Above are some common symbols that you might see.
|
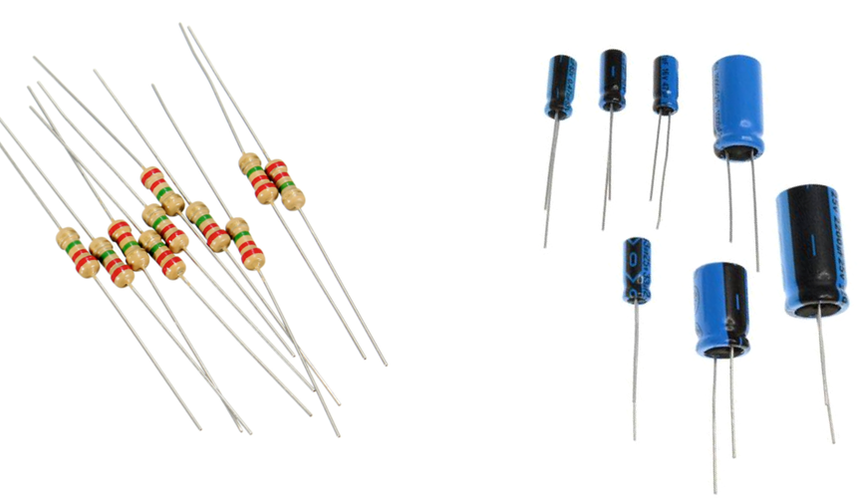
Resistors and capacitors are two common components in electrical circuits.
Resistors (left) resist the flow of electricity. The higher the value of the resistor, the more it resists and the less electrical current will flow through it. Resistance is measured in Ohms (Ω). Resistors may all look the same except for the different stripes on them that will tell you the value of the resistor. Resistors do not have positive or negative ends so it doesn't matter how you plug them in. Capacitors (right) store potential energy and keep the voltage constant when there are changing currents in a circuit. |
Prototyping
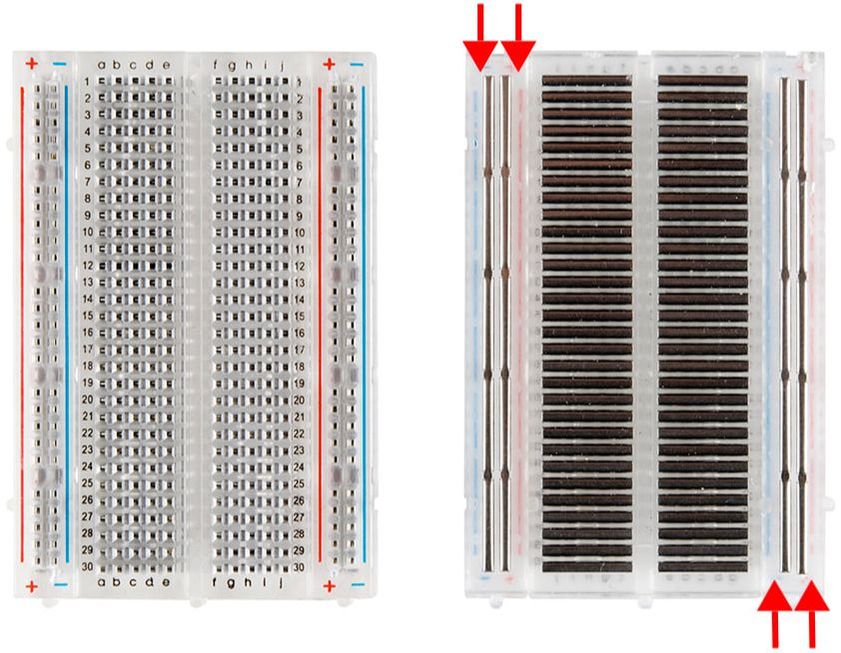
People have been tinkering with electrical circuits for a long time, but the solderless breadboard that we now use today (below right) was only invented in the 1970's. Originally, people used a literal bread board (a wooden board used for slicing bread, below left) to prototype their electrical designs. The electrical components were also much larger at that time. Breadboards, as we still call them, are a fundamental part of solderless circuit design, and are helpful when prototyping new ideas. The power rails flank the sides (running north-south) while the terminal strips (data) run east-west. The image (below right) shows the breadboard casing as well as the the embedded circuitry.
|
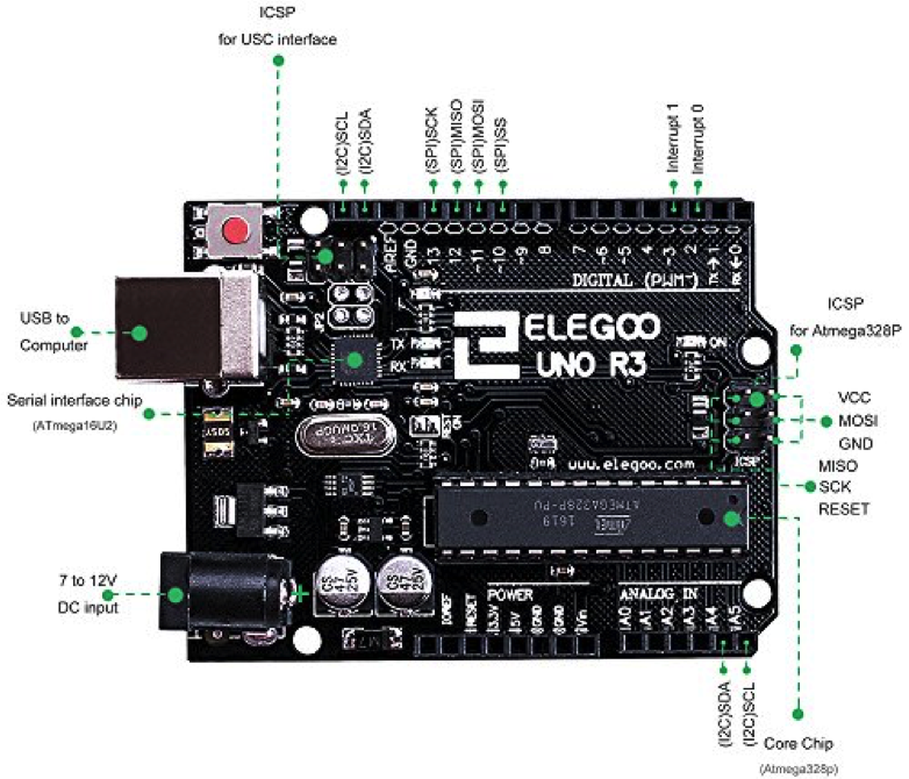
And this is what the board looks like. You may notice that it's not an Arduino board. One of the joys of the Arduino brand is that it's completely open source, so anyone can build (and sell) their own board that behaves exactly the same as an Arduino ($22). This semester we'll be using the Elegoo Uno ($10).
The board is controlled by the Microcontroller, or the "core chip" as labeled on the image to the left. These tiny computers can be programmed by uploading a program (or set of instructions). It is essentially the brain that makes the device able to automate your tasks. These tiny computers cost only a few dollars. Throughout the day, you are likely using microcontrollers more than you might thing. They're in coffee makers, alarm clocks, microwaves, and many other everyday objects. Your car my have 5-10 microcontrollers in use. The Elegoo Uno uses the Atmel ATMEGA 328 P - a small computer that you can program by uploading a program (or set of instructions). |
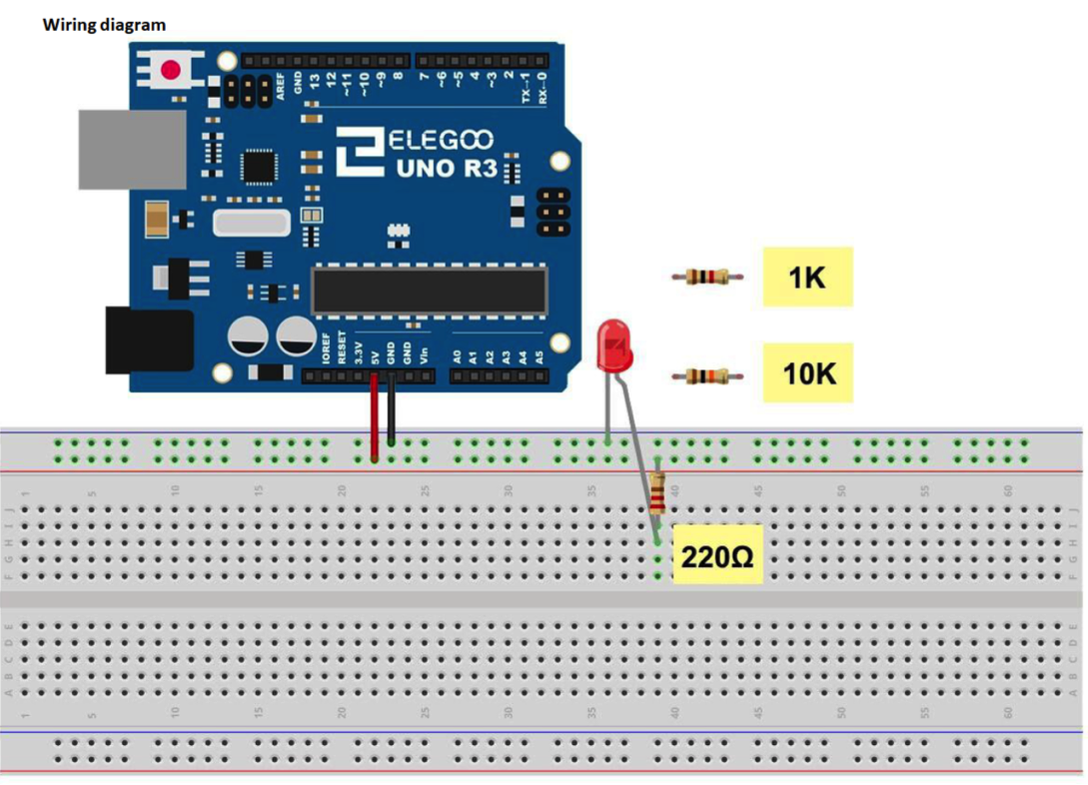
Let's try a quick example from the Elegoo Uno Super Starter Kit (V1.0.18.8.20). In this exercise, we'll power a red LED bulb and change the brightness based on the resistor used (changing the amount of electricity that actually gets to the bulb). Remember to always close the loop! Download the libraries and instruction manual for the "Elegoo UNO R3 Super Starter Kit" here:
https://www.elegoo.com/download/
https://www.elegoo.com/download/
|
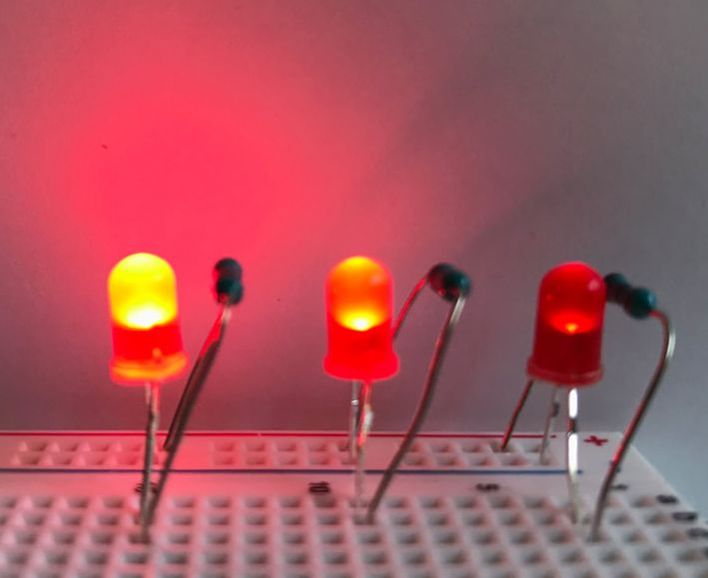
The above schematic shows only one LED plugged into the breadboard. Since we've already added power to the breadboard, there's no reason we can't plug in three different bulbs with different resistors, which is done in the image to the left.
From left to right, there's a 220 Ω, 1K, and 10K resistor. As previously mentioned, the lower resistor allows the most amount of energy to transfer into the bulb, creating a brighter glow from the bulb. All of the bulbs have the same capacity, so you can really see the impact of resistors in this experiment. |
All software is written in some kind of coding language.
There are a number of different 'languages' used to write computer programs. Unlike spoken languages, coding languages don't use vocabularies or alphabets. They're more like codes - special commands, abbreviations and ways of arranging text.
There are a number of different 'languages' used to write computer programs. Unlike spoken languages, coding languages don't use vocabularies or alphabets. They're more like codes - special commands, abbreviations and ways of arranging text.
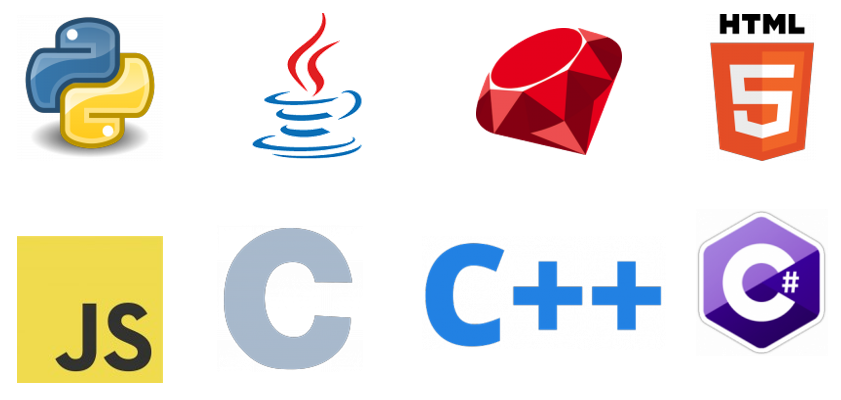
JavaScript is a prominent coding language used for websites. It's main platform is web browsers but has other uses as well. It is the most used coding language in the world.
Python was designed to emphasize code readability, with clear and expressive syntax - for this reason it is a good starter code language. It is mainly used to write scientific and numerical software - there's actually a plugin you can use with grasshopper to improve the functionality of your script.
C is challenging to learn, but is extremely powerful - it's a compiled language and it's readily built into nearly every operating system. C++ is an enhanced version of C that adds the object-oriented paradigm. Most computer games are written in C++. C# (C sharp) is also a compiled high-level language and runs on Windows only.
HTML isn't actually a real language, but it generates the structure that makes up web pages. If you ever build a website from scratch, you'd use HTML and CSS (the style information that makes the markup look nice). Go to any website and hit "Ctrl + U" - it should bring up the HTML code for that particular web page (example shown below)
|
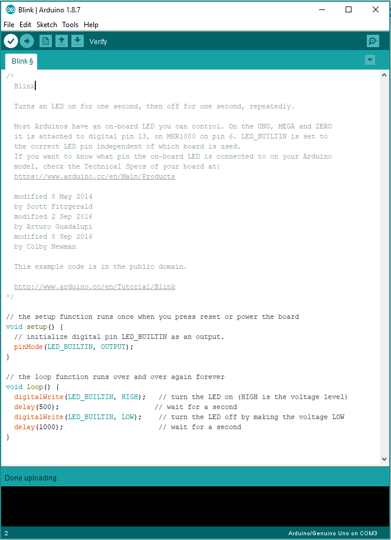
Arduino uses the IDE (Integrated Development Environment) to write code and send programs to the board. The IDE program is written and Java and uses a combination of C and C++ input. It's very user friendly and easy to use. Also, it has a huge amount of followers that have either posted solutions or can respond relatively quickly in online forums. We'll get more into the nuances of writing code in Arduino, but here are some basics:

You'll always start with the void setup( ). This goes at the beginning of all your code and is where you locate data pins, libraries, or other things that are consistent throughout the entire code. The void loop ( ) tells the computer what to do and will run over and over until you stop it.

Note that every line has a semicolon (;) after it and each chunk of code lives within a { } bracket
|
|
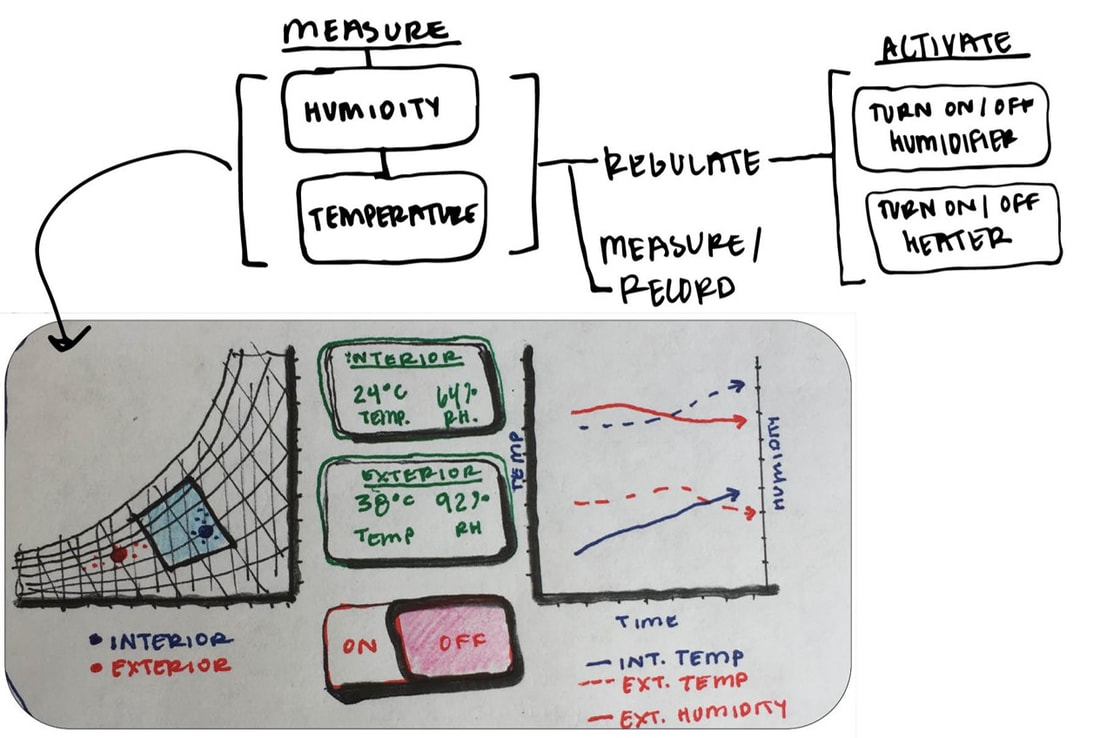
This is where you should be by the mockup presentation next week. You'll need to know what your measuring and what you are controlling. With this information we can start figuring out how to design the controls. |
FOR NEXT WEEK:
Please download and install the Adruino software.
https://www.arduino.cc/en/main/software
Watch this tutorial - it should take about one hour:
http://hello.processing.org/editor/
Download the Elegoo Super Starter Kit for UNO Tutorial. We'll use this in the electronics workshop:
https://www.elegoo.com/tutorial/Elegoo%20Super%20Starter%20Kit%20for%20UNO%20V1.0.2019.09.17.zip
Sources:
Huang, Brian, and Runberg, Derek. The Arduino Inventor's Guide : Learn Electronics by Making 10 Awesome Projects. SparkFun Series. San Francisco: No Starch Press, 2017.