Thinking in Scale
Take a look and Charles and Ray Eames' canonical Powers of Ten video. This short film looks at the relative size of things and the significance of adding a zero to any number. "Powers of Ten illustrates the universe as an arena of both continuity and change, of everyday picnics and cosmic mystery. It begins with a close-up shot of a man sleeping near the lakeside in Chicago, viewed from one meter away. The landscape steadily moves out until it reveals the edge of the known universe. Then, at a rate of 10-to-the-tenth meters per second, the film takes us towards Earth again, continuing back to the sleeping man's hand and eventually down to the level of a carbon atom" (Eames Office)
In architecture we deal with issues of scale and proportions all the time. We have to be able to translate from the city scale to the detail all while maintaining the same project goals.
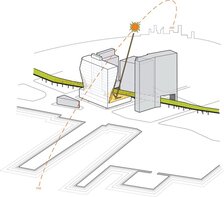
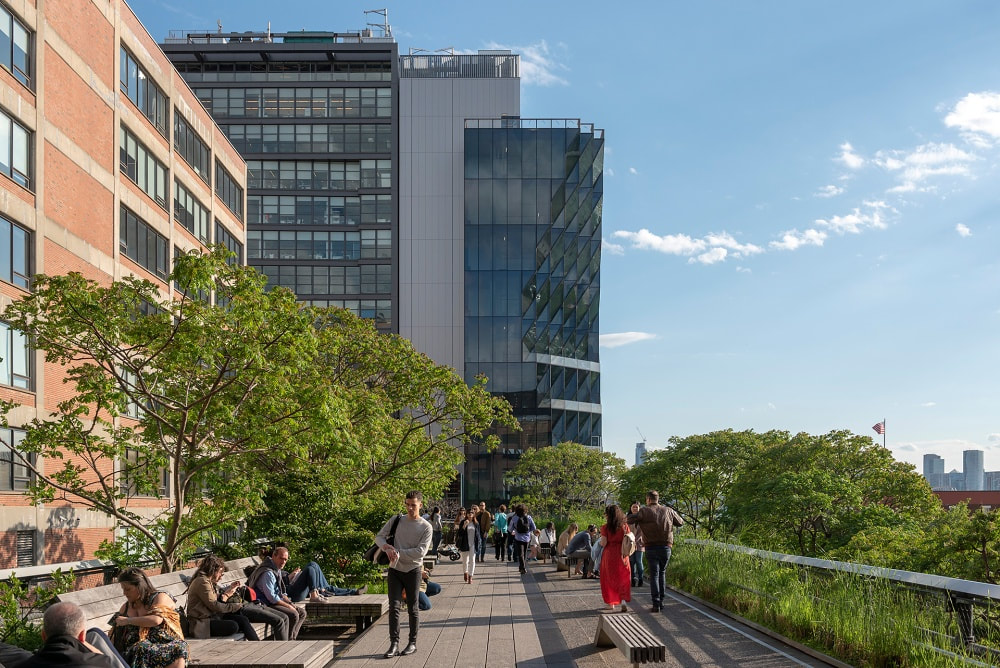
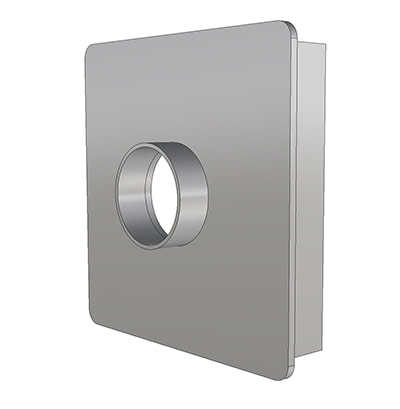
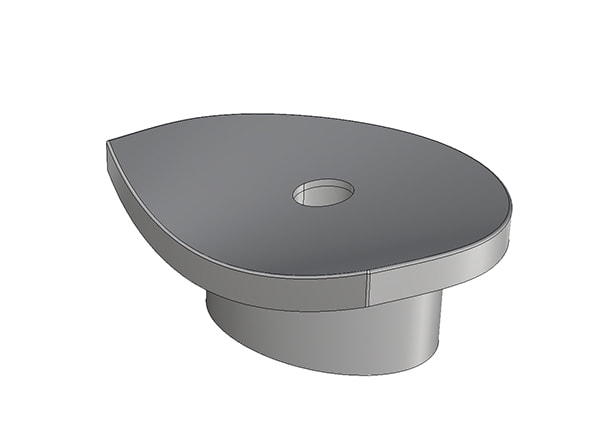
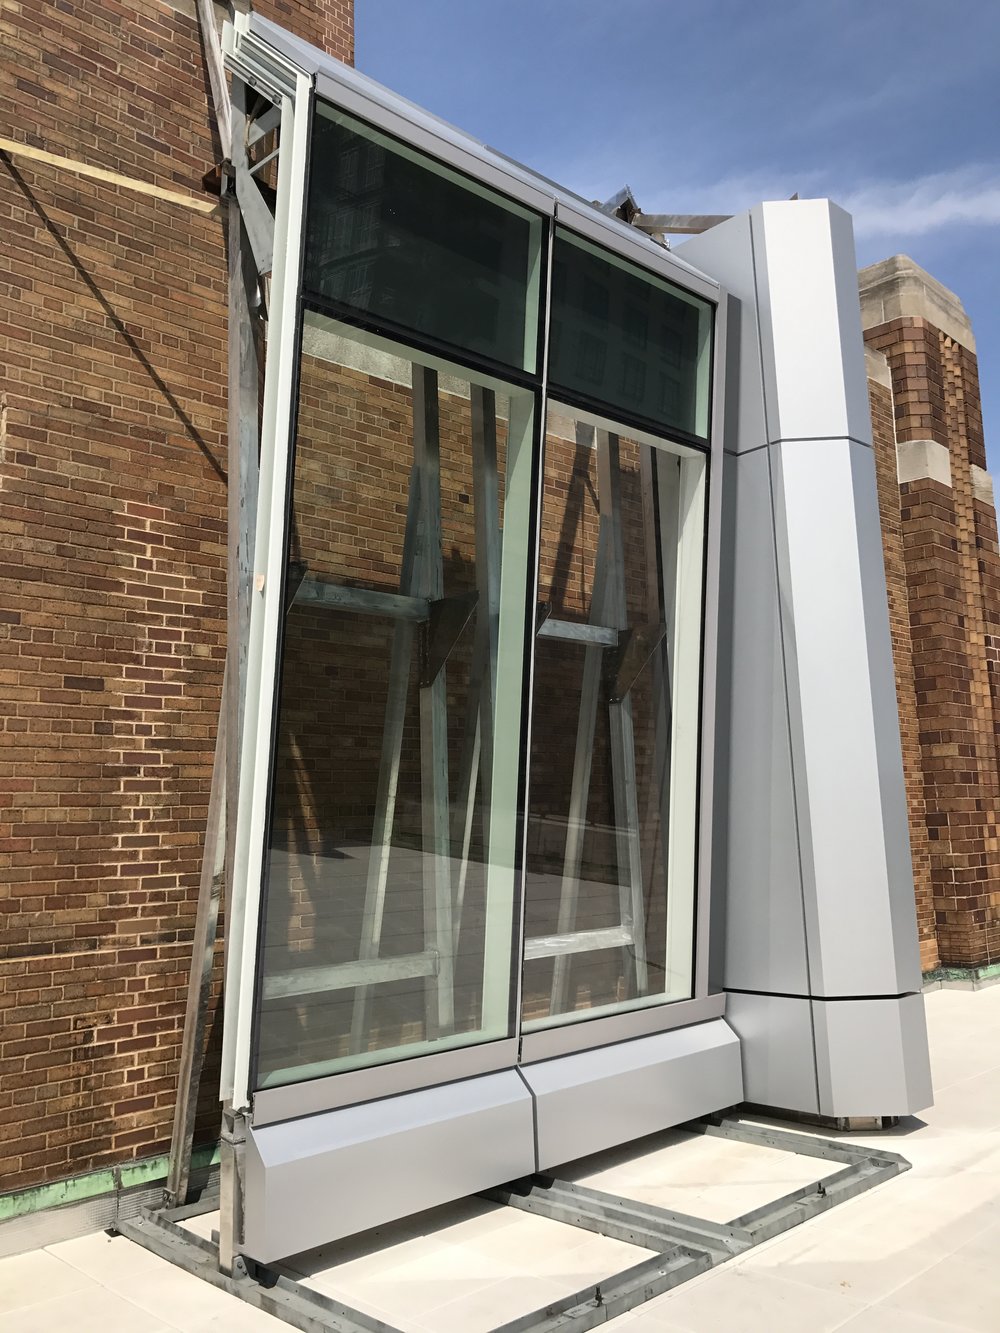
In early 2020, Jean Suh from Studio Gang came to UNC Charlotte to lecture about the Solar Carve tower in New York City. In this project, the designers considered every scale of the project - giving the same conceptual attention to the spandrel detail as they did to the building massing. I've worked in firms where the designer typically handed the project off to technical staff some time during design development (DD), so I appreciate this level of technical storytelling in alignment with the project narrative.
In early 2020, Jean Suh from Studio Gang came to UNC Charlotte to lecture about the Solar Carve tower in New York City. In this project, the designers considered every scale of the project - giving the same conceptual attention to the spandrel detail as they did to the building massing. I've worked in firms where the designer typically handed the project off to technical staff some time during design development (DD), so I appreciate this level of technical storytelling in alignment with the project narrative.
|
|
Images by Studio Gang
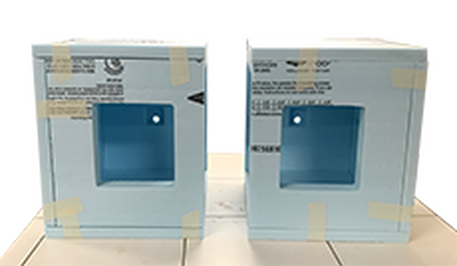
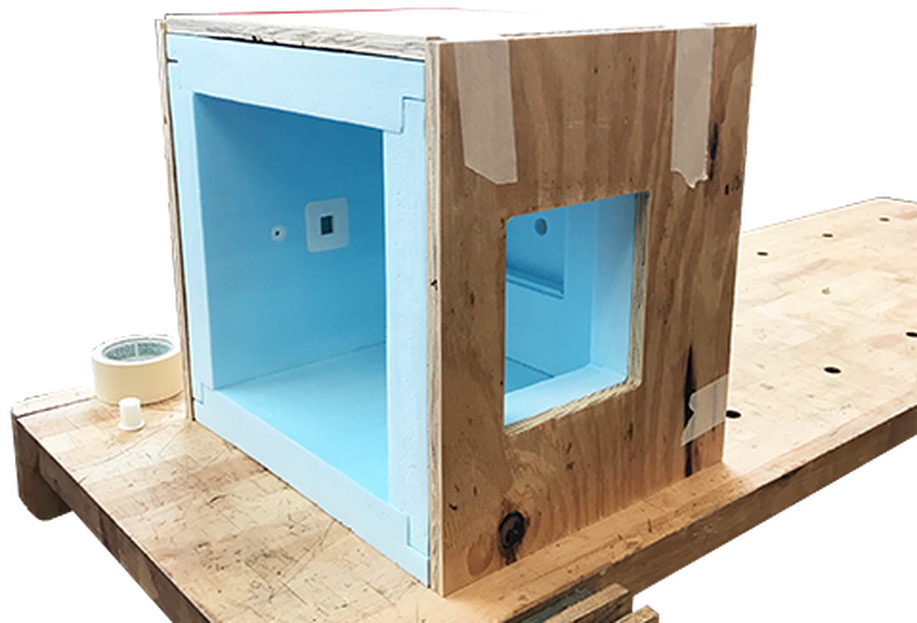
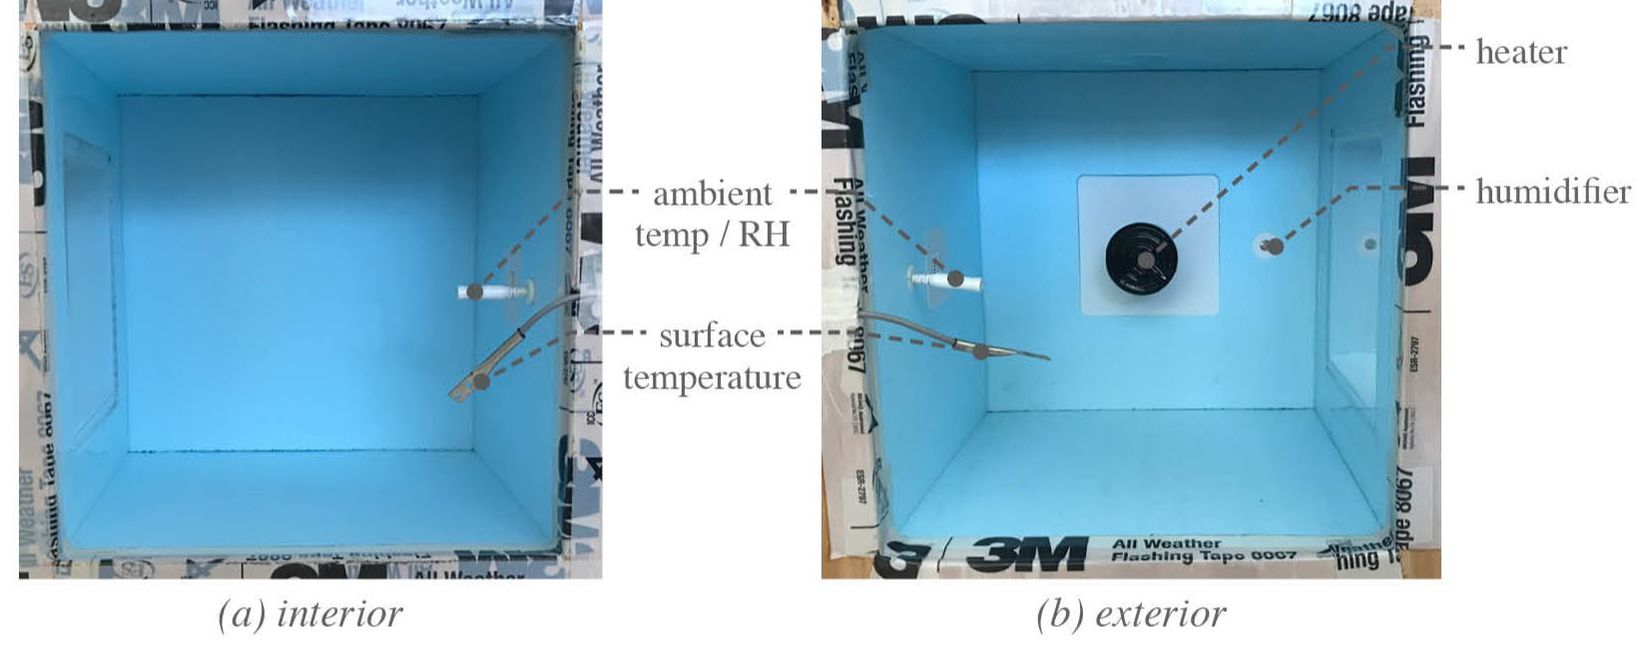
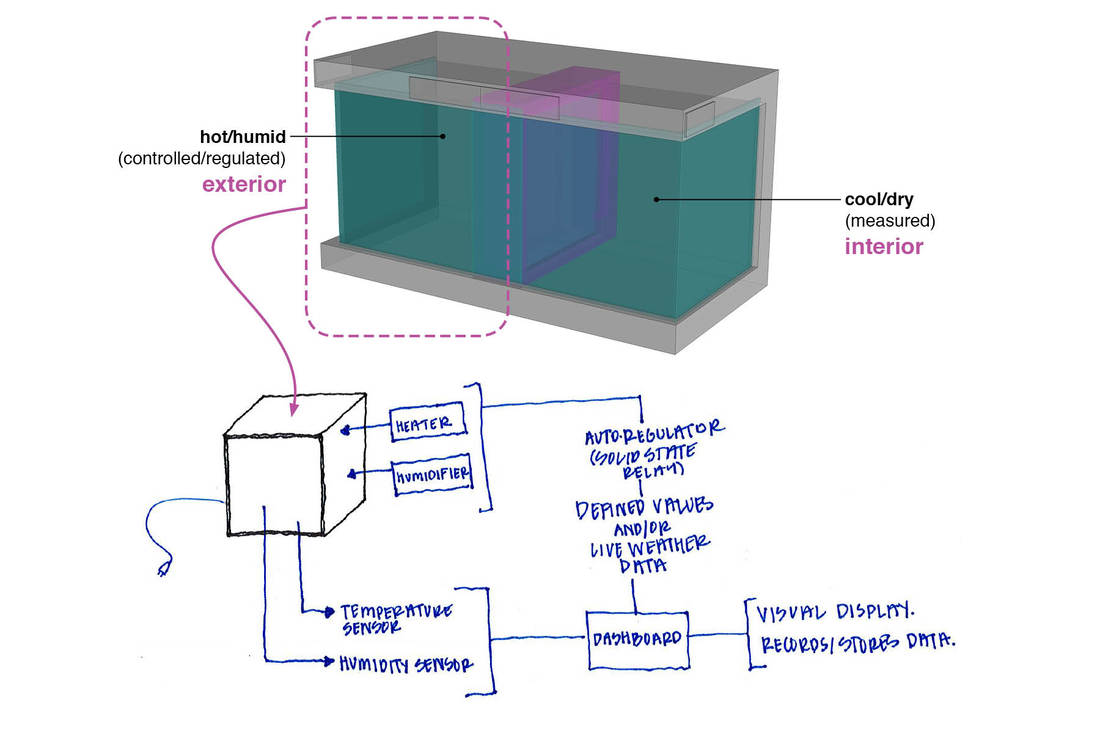
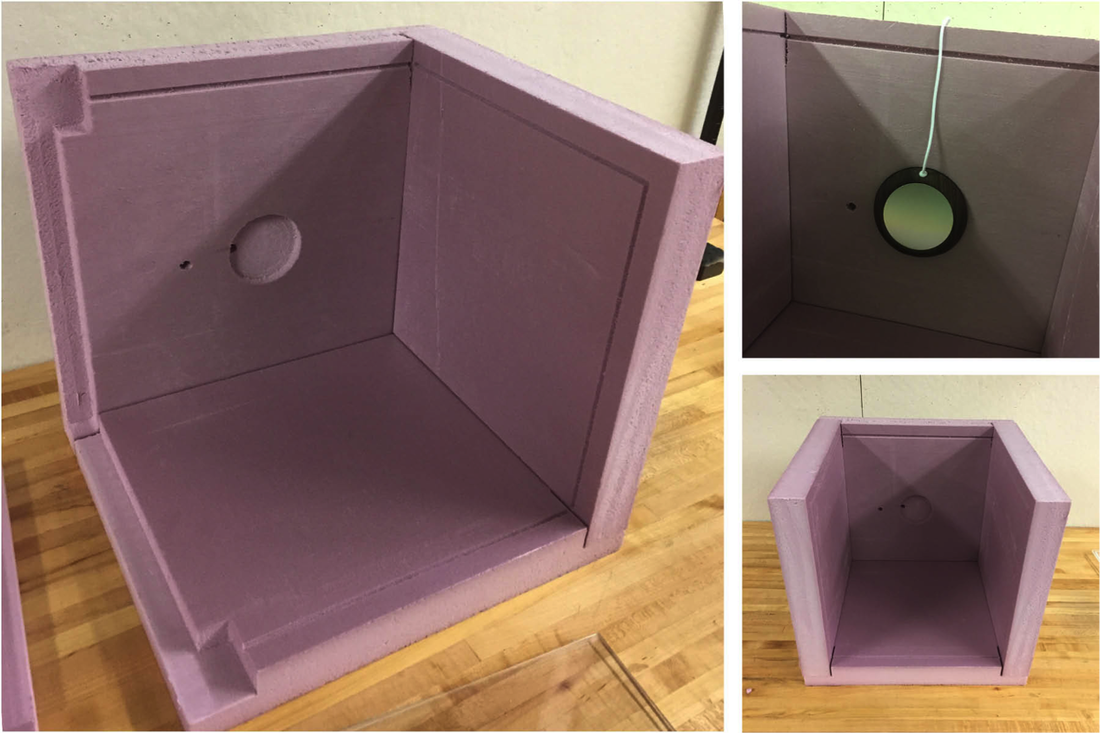
Working with physical experimentation is no different, despite the size and scope of the project. You need to have a coherent goal in mind in order to avoid continuously rebuilding your experimental device. In the 'environment box', the goal was to study heat and moisture transfer through various interchangeable materials. Though this was a simple concept, it took careful coordination to make it work.
Environment Box
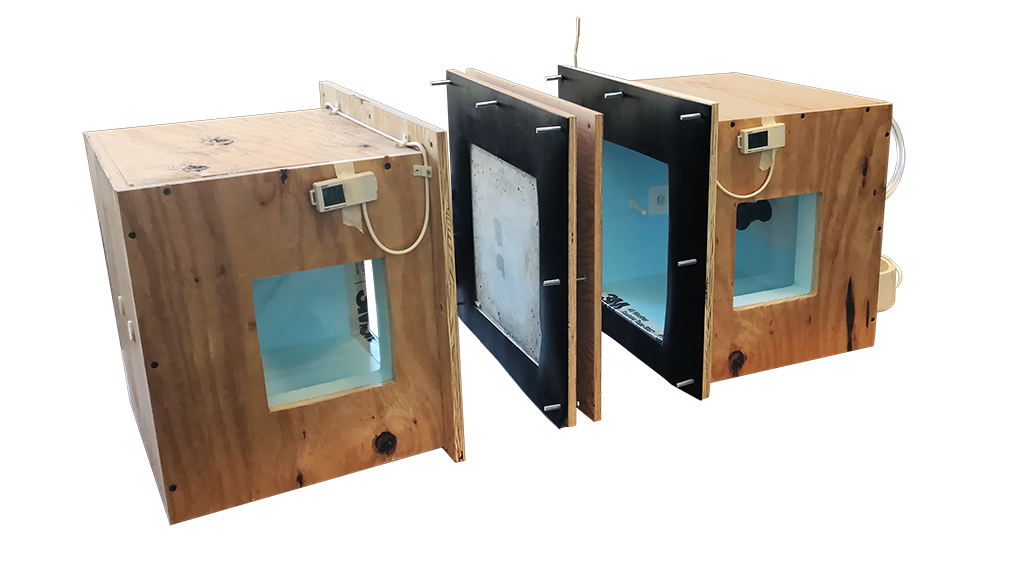
Thermally, we just need foam for the two enclosures. However, foam is quite delicate and it would be difficult to tightly seal the interchangeable material sample between the two chambers. For that reason, a plywood enclosure wrapped the foam to provide an attachment surface as well as a durable enclosure system.
|
|
In order to provide heat, moisture, power and sensors within the chambers, we had to punch a few holes. These holes needed to be sealed to avoid unintentional heat or moisture loss. In some instances, we had to drill very large holes for small wires to allow the plug to be able to pass through. Keep this in mind when you're considering potential punctures.
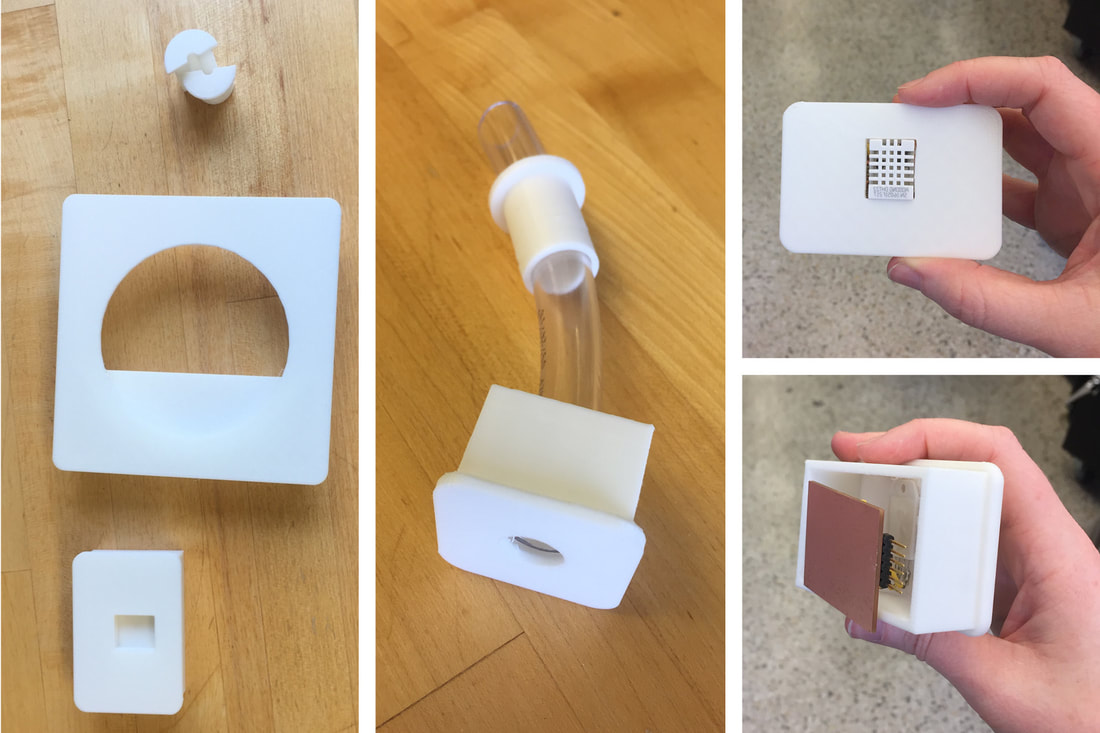
Foam is quite easy to work with, but it is not plastic - meaning it does not return to its original shape once manipulated. That means you'll need to design some custom housings to hold your sensors or equipment in place. The 3d printer is a great tool for that.
Foam is quite easy to work with, but it is not plastic - meaning it does not return to its original shape once manipulated. That means you'll need to design some custom housings to hold your sensors or equipment in place. The 3d printer is a great tool for that.
|
|
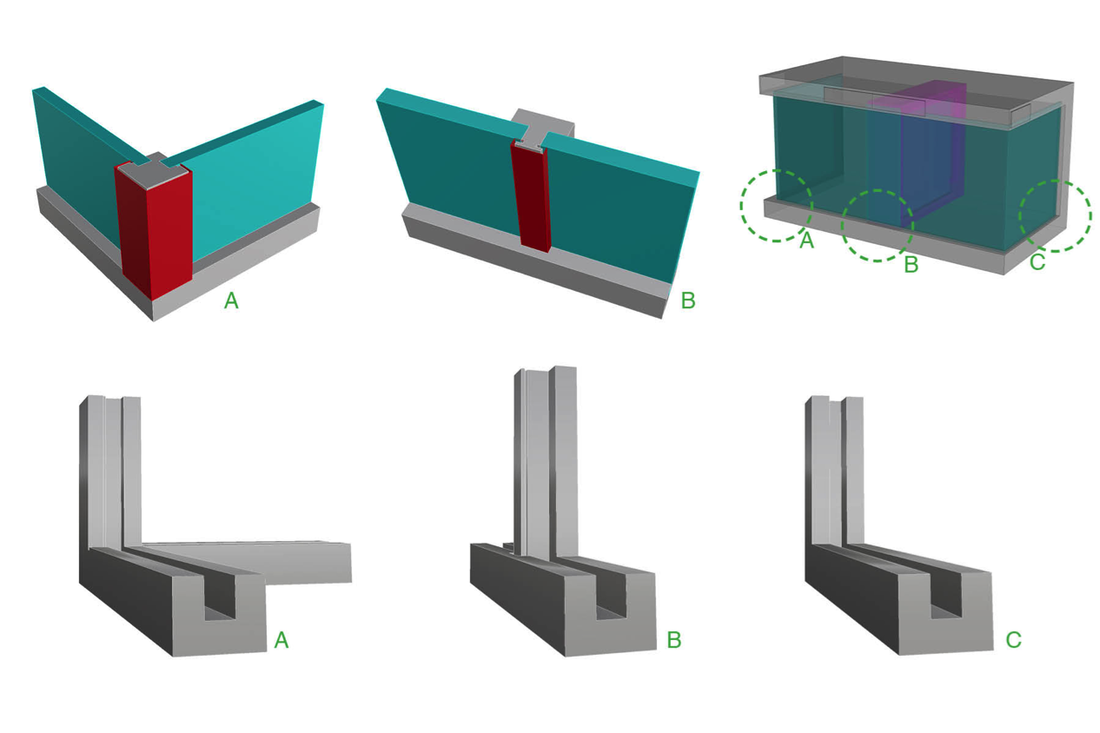
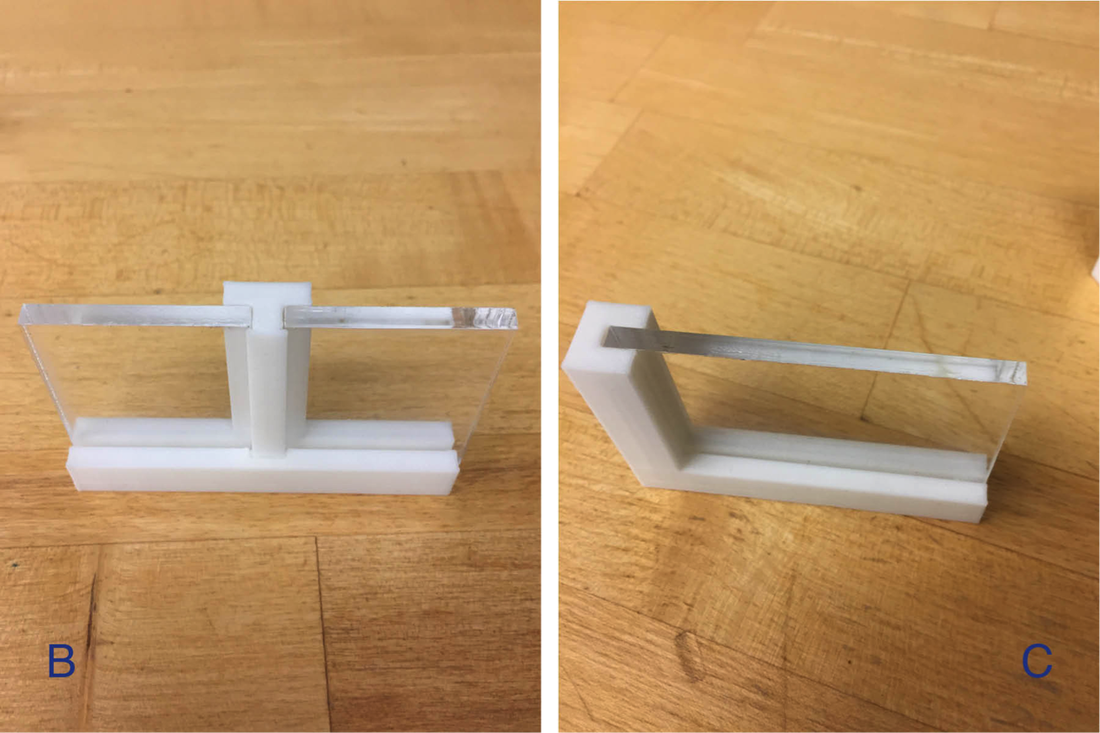
In this project, it was important to get a completely airtight seal that may not be possible from the friction joint between the acrylic and foam, particularly as I was assembling and disassembling the project fairly regularly. In response, I evaluated all the different conditions that occurred in this project, and found three, shown below:
|
|
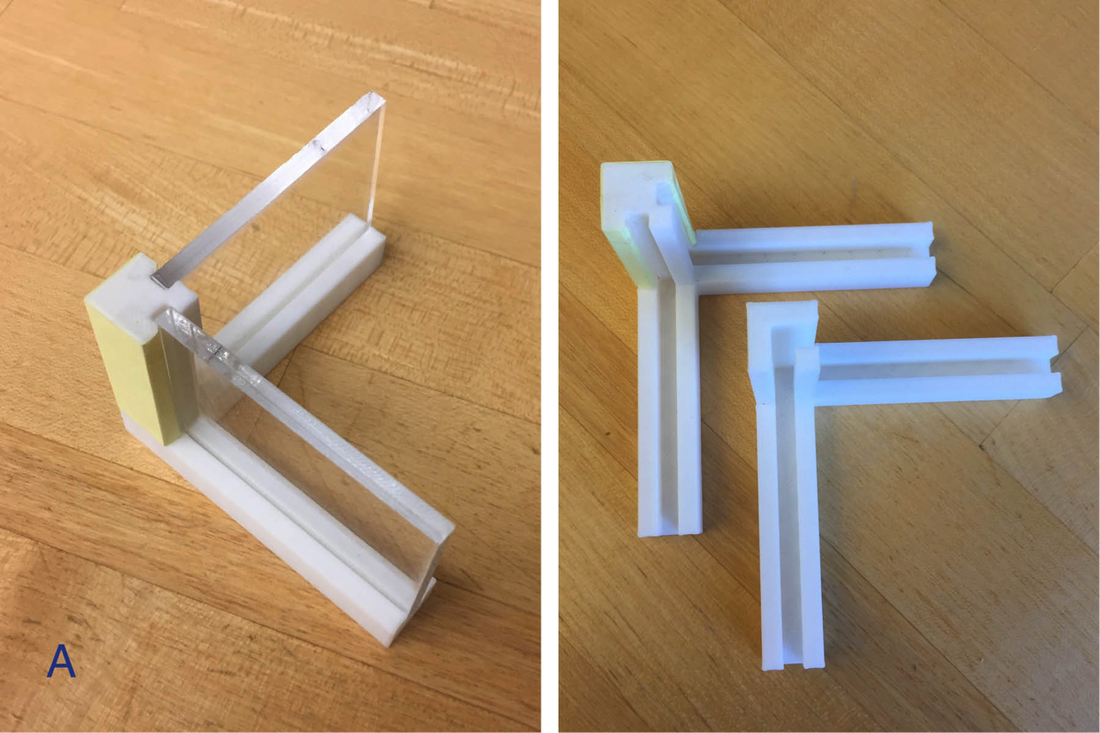
Just so I could visualize what exactly was going on, I modeled the conditions in rhino and 3d printed each condition at full scale. In condition A, for example, this was a good decision because the way it wouldn't have worked as designed when actually cast out of silicon. 3d printing is a really easy way to test out your ideas without committing too much time into the process.

|
Here you can see the three tests I did before actually pouring the silicon (which can be somewhat pricey). At the top is the 3d-printed test. The concrete-like sample at the bottom is the first actual casting attempt... which clearly failed. When working with molds and casting, it can be really confusing to make a mold for something, especially when it's built in two pieces. Normally you're thinking of the 'positive' but when you're building a mold, you're actually designing the 'negative'. The middle option was from a revised mold, and this blue material is actually a 'gummy' material so I was able to verify that my mold would work when I finally poured the silicon. |
Methods
|
Everything stems back to the research question. You really can't proceed until you know exactly what you want to explore and why. This should be very clear. For example:
How does moisture move through various materials in hot-humid conditions? Once you have your research question, you can start articulating how you will address it. From there you need to figure out the logistics of your apparatus - what is it made of and how do you control it?? |
What are you going to measure?
•Temperature? Humidity? Heat flux? Energy use? Sound? Emissivity? and how are you going to measure it? We have a number of sensors in the IDRL and we will also be learning how to build our own sensors, so please do not let this limit your ideas.
How are you going to record your data?
Data logging? Visual observation? Tracking over time? Serial monitor?
We can be inundated with data, so be careful about how much you generate. Don't allow yourself to be distracted and remember that data doesn't necessarily mean numbers!
Regardless of what you do with your data, you'll need to run multiple tests under the same conditions in order to validate your findings. Also, be sure to also set up a control setting.

|
accuracy
|
precision
|
stability
|
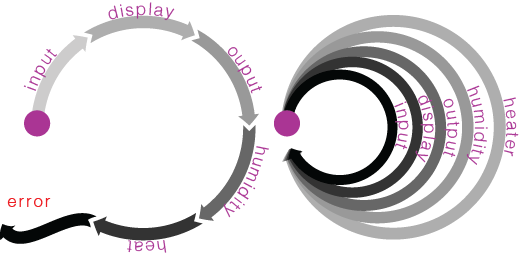
Accuracy is the extent to which a given measurement, or the average of a set of measurements for one sample agrees with the definition of the quantity being measured, or a degree of correctness. In the example above, all of the dots are evenly distributed from the center however they are not actually close to each other.
Precision represents repeatability - the extent to which a given set of measurements of one sample produce the same result. (does it read the same way every time you measure it?) In the example above, the points are all quite close to each other - in this context their distance from the bulls eye does not matter.
Stability refers to consistency - the amount of measurement change you can expect over a period of time. In the example above, you may get a little more accurate with each throw.
Fab·ri·ca·tion
noun
the action or process of manufacturing or inventing something
Making is an integral component of this class. While I am an avid user and proponent of digital simulation technologies, I believe that one must experience complex concepts with the hand before they can fully understand the same concepts in the digital realm. I also believe that one must work with tools and materials extensively to understand how parts and pieces come together in drawings.
"Architects tend to draw what they can build, and build what they can draw" - Bill Mitchell
Throughout the semester we'll explore basic and advanced fabrication techniques to aid in the development of your experimental design procedures. All production will take place in the Storrs FabLab.
"Architects tend to draw what they can build, and build what they can draw" - Bill Mitchell
Throughout the semester we'll explore basic and advanced fabrication techniques to aid in the development of your experimental design procedures. All production will take place in the Storrs FabLab.
|
"Encompassing nearly 5,000 square feet, our FabLab supports all research and student work through hands-on experimentation. Included in this footprint are fully-equipped wood, metal, and digital facilities linked together to provide a seamless workflow. We aim to understand material performance, assemblies, construction techniques, and scales through the medium of fabrication. Industrial CNC equipment interfaces with our non-digital tooling to foster a culture of machine knowledge that permeates all facets of the design disciplines. The capabilities of the FabLab also extend into a large, 3,000 square-foot outdoor construction yard for year-round use." |
|
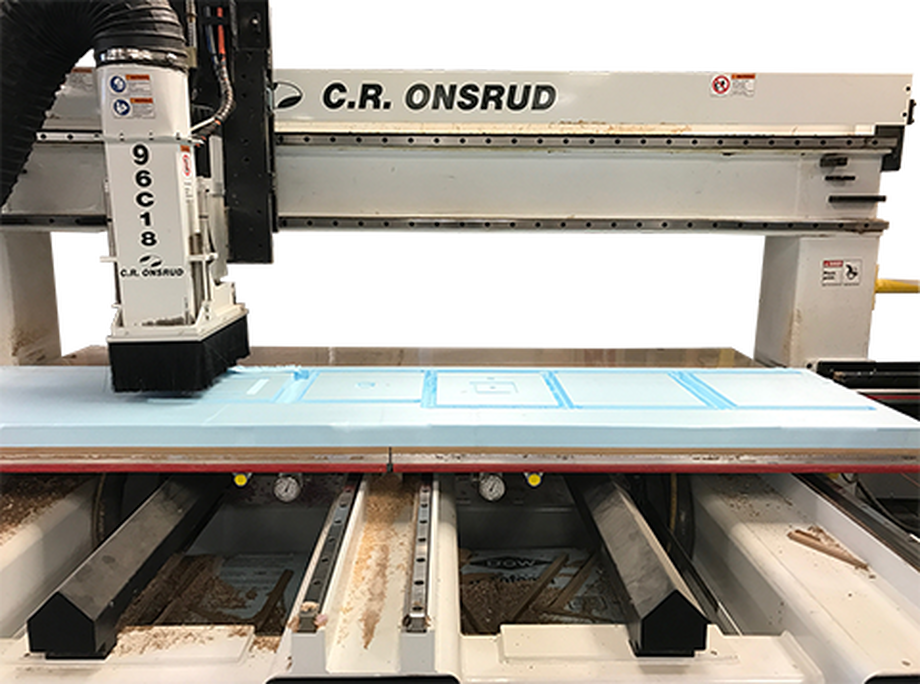
As you design, be aware of machine capabilities. Like a table saw, a laser cutter will leave a kerf that ranges from .08mm - 1mm (larger for materials with low melting points (like foam. but don't laser cut foam, it's toxic) The CNC router cuts with a round spinning bit. You will not be able to get sharp interior corners and you may need to do a little post processing (which can be difficult on materials like wood, but is quite simple on foam). These are only a few examples that you should be aware of. |
|
I can't emphasize this enough - test your ideas regularly. Don't wait to the very end to test your efforts. Using Barry Boehm's 1986 theory of Circular Development, test only one thing at a time. This applies to physical construction just as much as it applies to coding and electronics design. This way it is easier to troubleshoot problems as they occur. |
Mockup
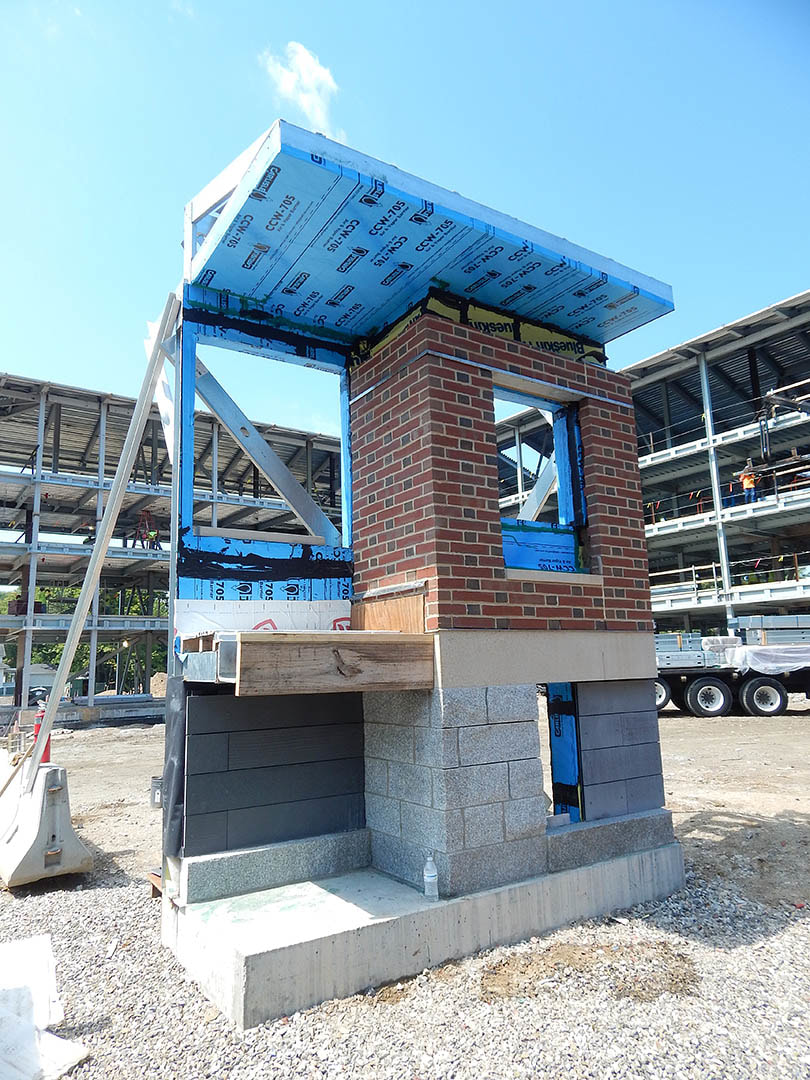
Mockups are commonly used in buildings to test new ideas, understand the way materials come together, or just to give the owner or architect one more opportunity to make improvements. Here are two examples from 'the wild'.
|
|
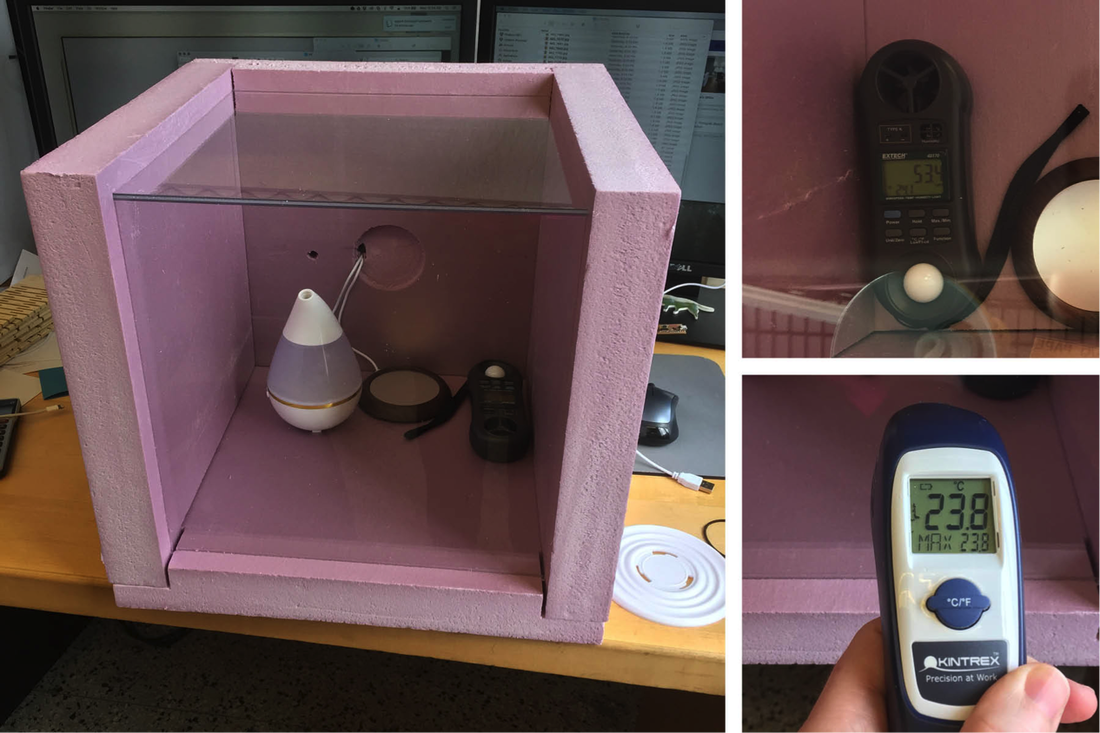
Though we're not exactly making buildings yet, it's still important to test out our ideas at a small scale. Here's how I used a mockup when developing the Environment Box.
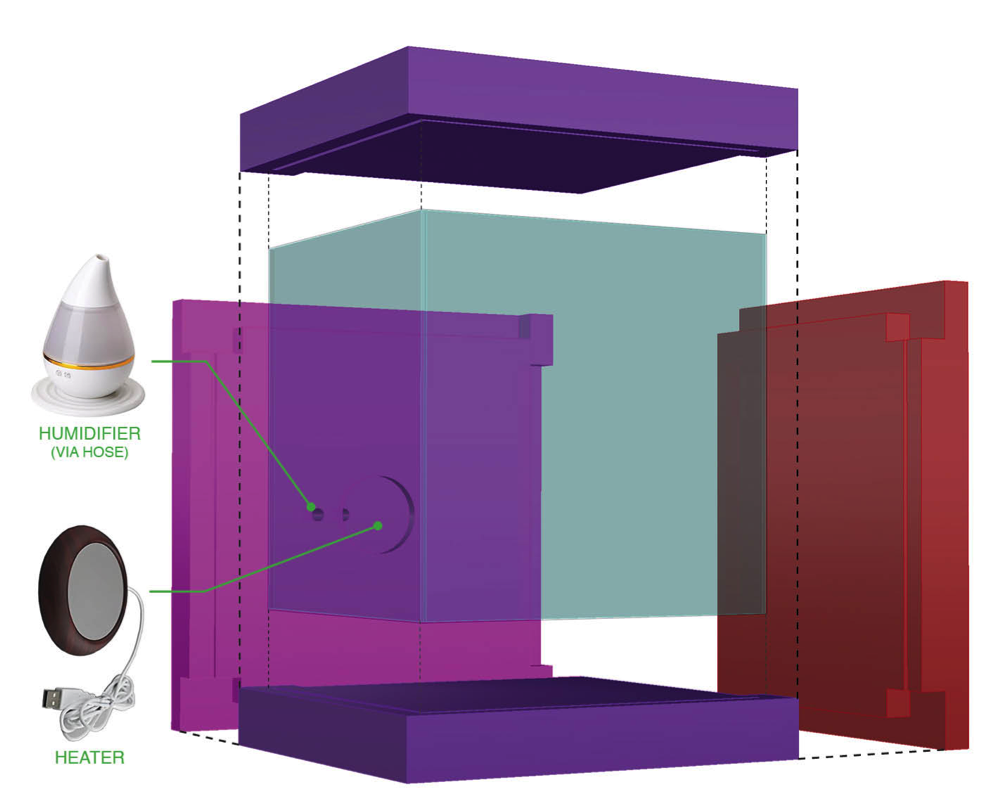
Mockups are often used to test ideas at a small scale before moving forward with full-scale fabrication. Because the hot/humid (exterior) side of the chamber had the most complexity, I decided to build that half of the apparatus. The diagram above shows the inputs/outputs that needed to be designed into that side of the box.
|
|
Above, I redesigned the box to stand on its own, so I didn't have to worry about the changeable facade intervention or the cold/dry (interior) box. I used a small, "personal" humidifier and a mug warmer for the heater. I used the CNC to cut the foam and a laser cutter to cut the acrylic sheets so that everything would fit together tightly.
|
I didn't have to use any glue or tape for this project because everything fit together so tightly (thanks, CNC machine!). Lessons learned: - when cutting holes for wires, I forgot to make the whole big enough for the plug to pass through. Otherwise, you can't pass the wire through. - the mug warmer was not powerful enough to heat the box. - the humidifier did not work, so I had to send it back. |
At this point in the semester, you should have a clearly articulated research question. Next, you'll start determining your methods and begin construction of your mockup.
Please come to class on Tuesday with sketches of your design and controls strategy.
Please come to class on Tuesday with sketches of your design and controls strategy.