The chamber was built quickly and affordably using readily accessible materials. The enclosure is made with construction-grade plywood and 2” XPS insulation board. The heat and humidity conditions of the exterior box are maintained by a 25W terrarium heat lamp and a household humidifier. For controls and operation, the project uses the open-source Arduino platform, which has a large following of online users that share code and libraries. With very little electronics and coding experience, the author was able to regulate and maintain the controls to a relatively high level of precision. In exchange, the author has shared all of the resources used in creating the testing apparatus. All files, including code, machining and 3d print files have been shared via GitHub so that other users can download and contribute to the project. Certainly, the next step of development would be to promote the constructability and affordability of the testing apparatus in order to create a network of users that share construction improvements and material data. Step-by-step instructions have also been posted online and compiled in a book in tutorial format. These instructions, as well as product information, costs, calibration methods and testing procedures, can also be found in Appendix B of this thesis.
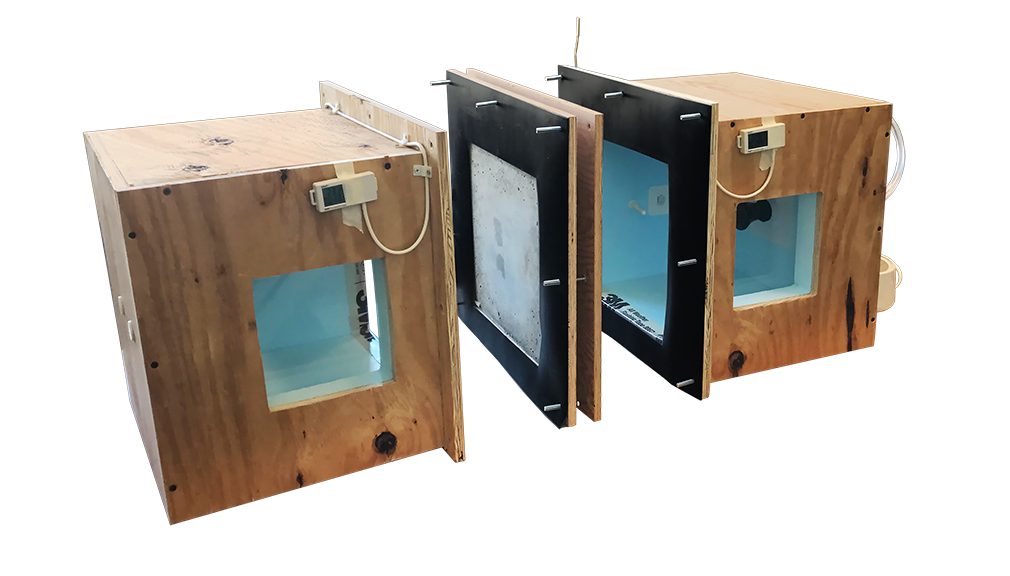
Since the testing chamber is quite small compared to industry standard testing chambers, it had a greater surface to perimeter ratio, which may provide for increased lateral transfer of heat and moisture. As a result, extra care was taken at the perimeter of test materials to prevent this. Each sample was built into an insulated wood frame. Though the clear opening of the testing chamber is 12x12”, each specimen was constructed to 13x13” so that the neoprene gasket between the sample could seal the chamber and prohibit transfer of air and moisture through the wood frame. Each specimen was taped at the edges to prevent lateral moisture transfer through the material. It was then embedded into a plywood box, which was insulated with 2” XPS foam (to match the chambers) outside of that plywood, as shown in Figure 34.
Since the testing chamber is quite small compared to industry standard testing chambers, it had a greater surface to perimeter ratio, which may provide for increased lateral transfer of heat and moisture. As a result, extra care was taken at the perimeter of test materials to prevent this. Each sample was built into an insulated wood frame. Though the clear opening of the testing chamber is 12x12”, each specimen was constructed to 13x13” so that the neoprene gasket between the sample could seal the chamber and prohibit transfer of air and moisture through the wood frame. Each specimen was taped at the edges to prevent lateral moisture transfer through the material. It was then embedded into a plywood box, which was insulated with 2” XPS foam (to match the chambers) outside of that plywood, as shown in Figure 34.
For more information about each phase of the construction process, see here:

|
|
|