Methodology
Methods for Testing:
Pre-Conditioning:
- Let Water & Sand & Test Chamber sit at room temperature for 24 hours.
- Prepare Testing Box (Remove lid, clear of any contaminants, Check & prepare electronics)
- Fill test chamber with testing material (0.5 Cubic Ft).
- Close the lid of the box.
- Check Arduino serial monitor is clear & set up to log data with timestamp activated.
- Using the upload button on Arduino software begin recording data.
- Filling test chamber trough with 64 Oz of water
- Turn on Mock-Sun 250W Heat Lamp. (If Applicable)
- Continue to record data for 40 mins.
- After 40 mins stop logging data. (Effectively done by unplugging the Arduino from its power source)
- Save data
- Clear testing material from testing chamber
- Repeat steps 1-8 with the next testing material.
- Repeat step 8 until all materials have been tested.
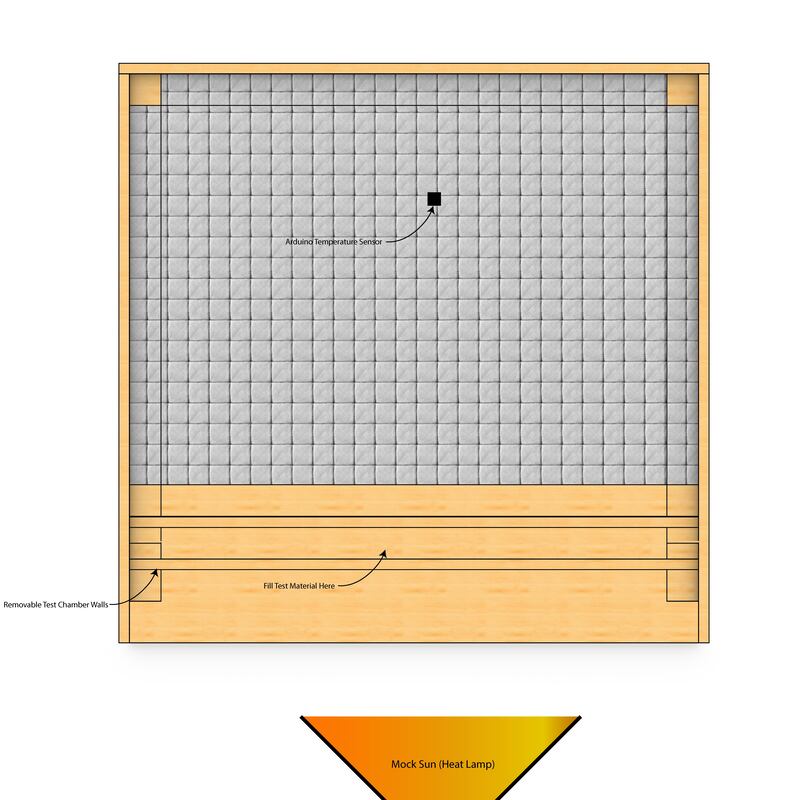
Figure 11: Testing diagram which shows location of; Test Materials, Removable Chamber wall, Arduino Sensor & Heat Lamp
Material |
Sun on/off |
Other Notes: |
Air |
Off |
Control (1) |
Air |
On |
Control (2) |
Sand |
Off |
Test Material (1) |
Sand |
On |
Test Material (1) |
Dirt |
Off |
Test Material (2) |
Dirt |
On |
Test Material (2) |
Gravel |
Off |
Test Material (3) |
Gravel |
On |
Test Material (3) |
Air - W/O Water |
On |
Temperature Gain Location Test (1) |
Air - W/O Water |
Off |
Temperature Gain Location Test (2) |
Prototype Preliminary Testing Data:
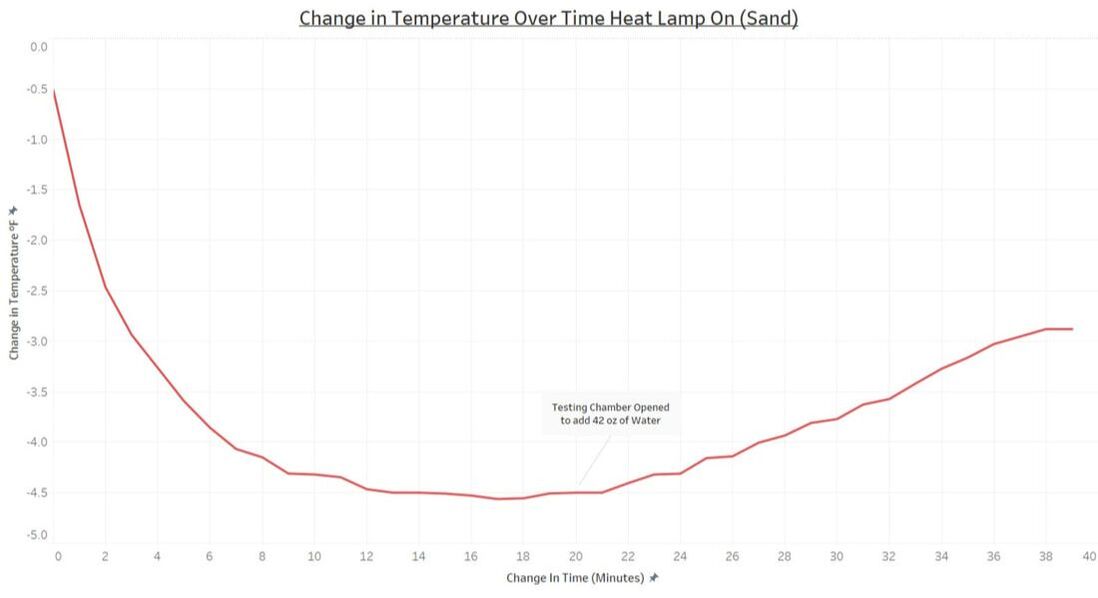
Figure 12: Line graph which shows results of Preliminary testing where sand is tested with heat lamp on. Pre-testing chamber corrections (Outlined in Construction Tab:)
|
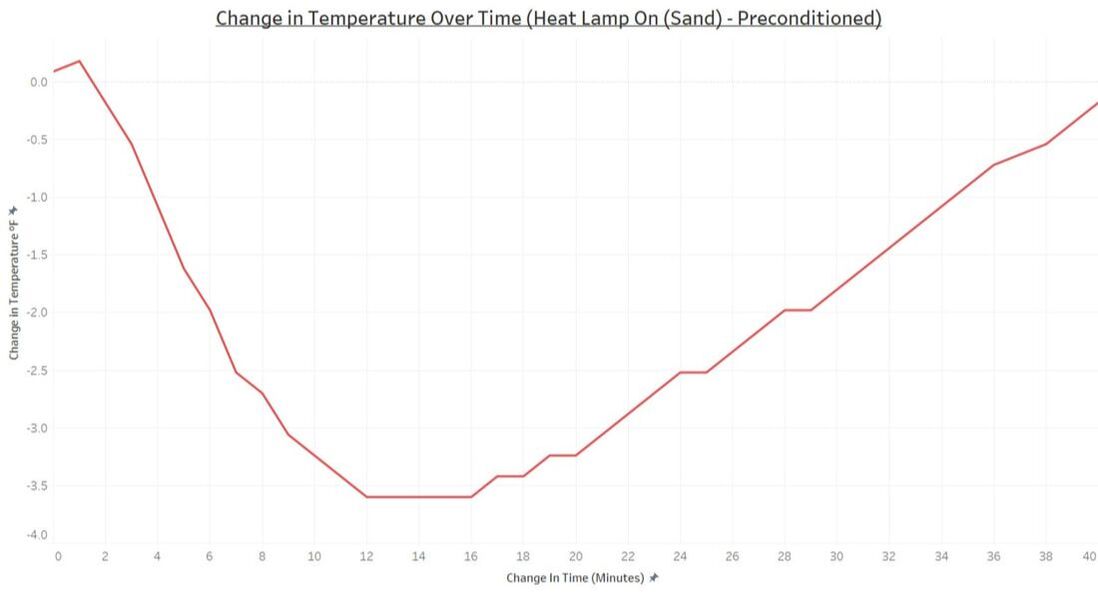
Figure 13: Line graph which shows results of Preliminary testing where sand is tested with heat lamp on. Post-testing chamber corrections (Outlined in Construction Tab:) with preconditioned materials
|