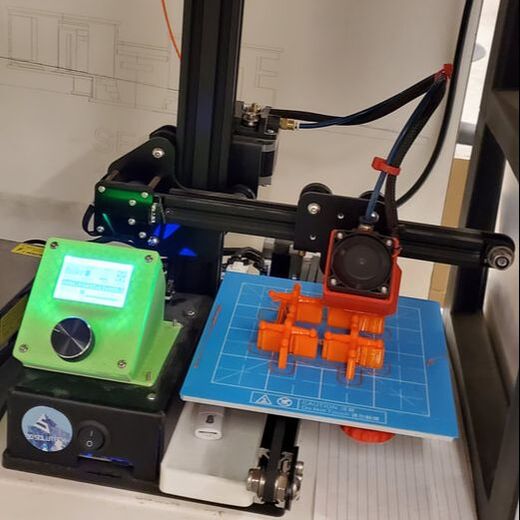
Gyroid Form - Development and Fabrication
Development :
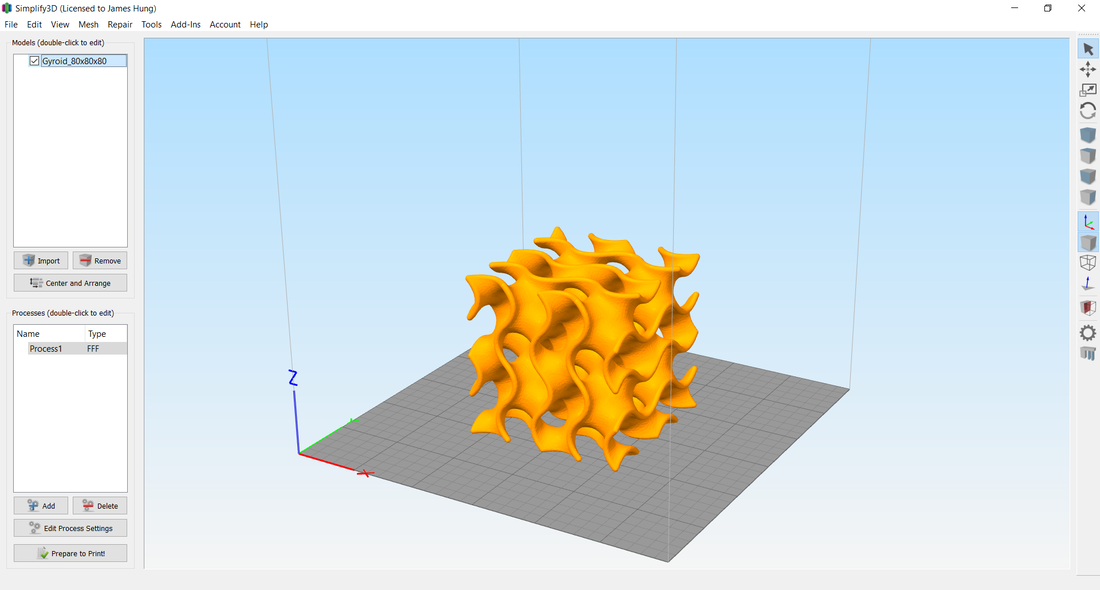
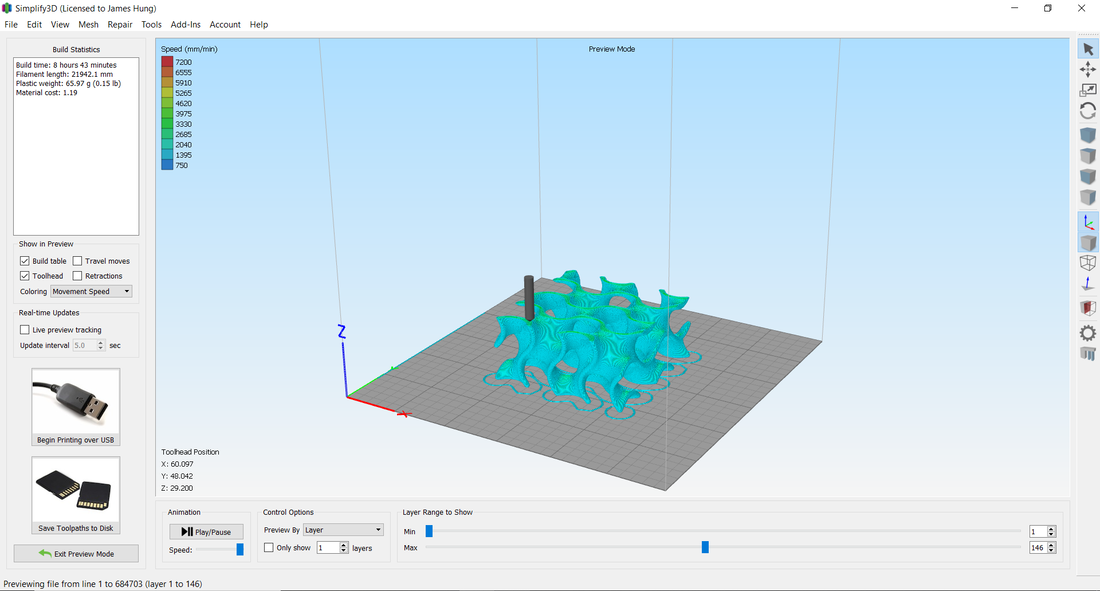

Infill: 10%
Raft: Yes
Layer Height: 0.2
.STL File:
Raft: Yes
Layer Height: 0.2
.STL File:
| gyroid_cube.stl |

Infill: 10%
Raft: Yes
Layer Height: 0.2
.STL File:
Raft: Yes
Layer Height: 0.2
.STL File:
| gyroid_jack.stl |

Infill: 20%
Raft: Yes
Layer Height: 0.2
.STL File:
Raft: Yes
Layer Height: 0.2
.STL File:
| jacks.stl |
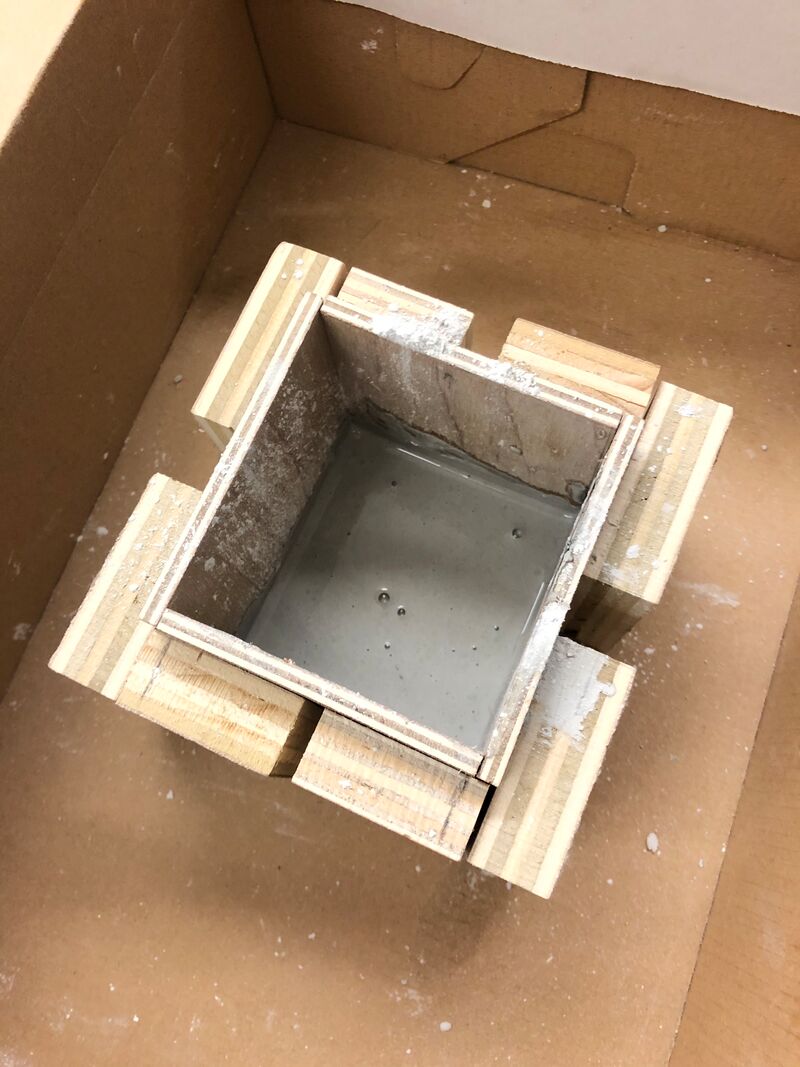
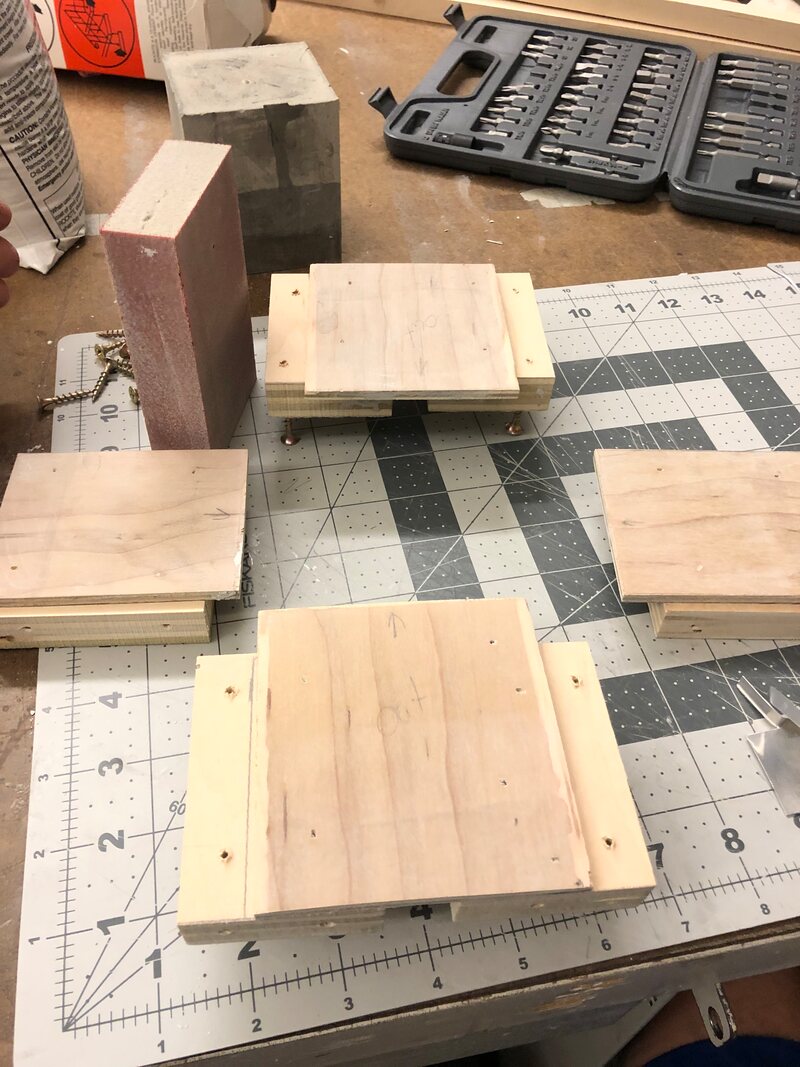
Texture // Concrete Bonding to Printed Form

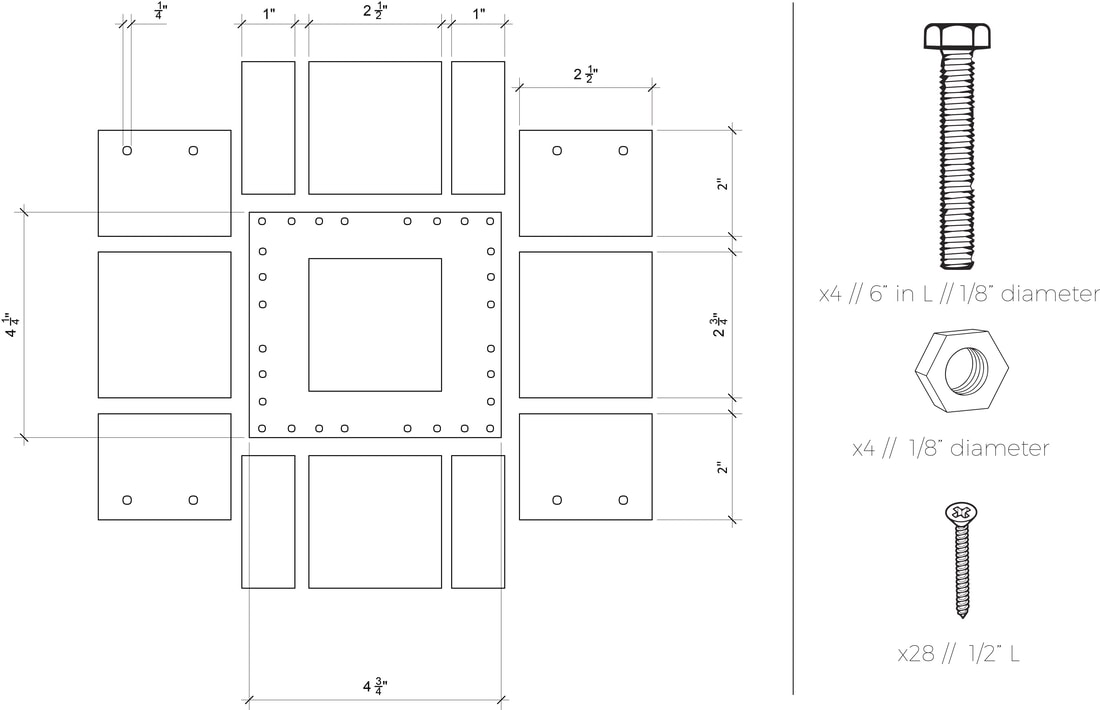
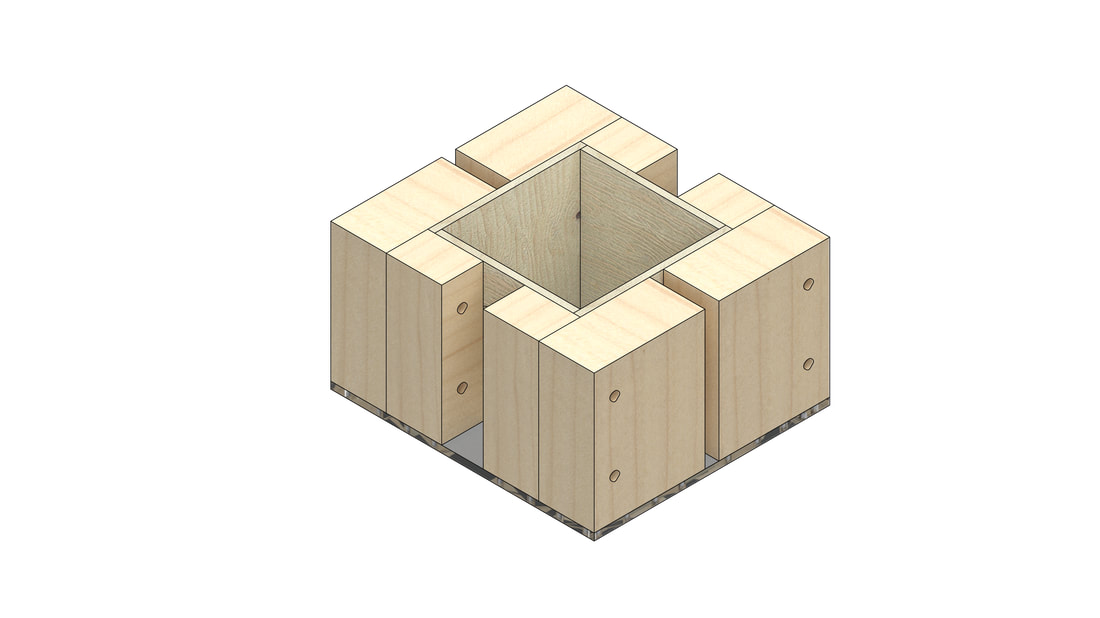
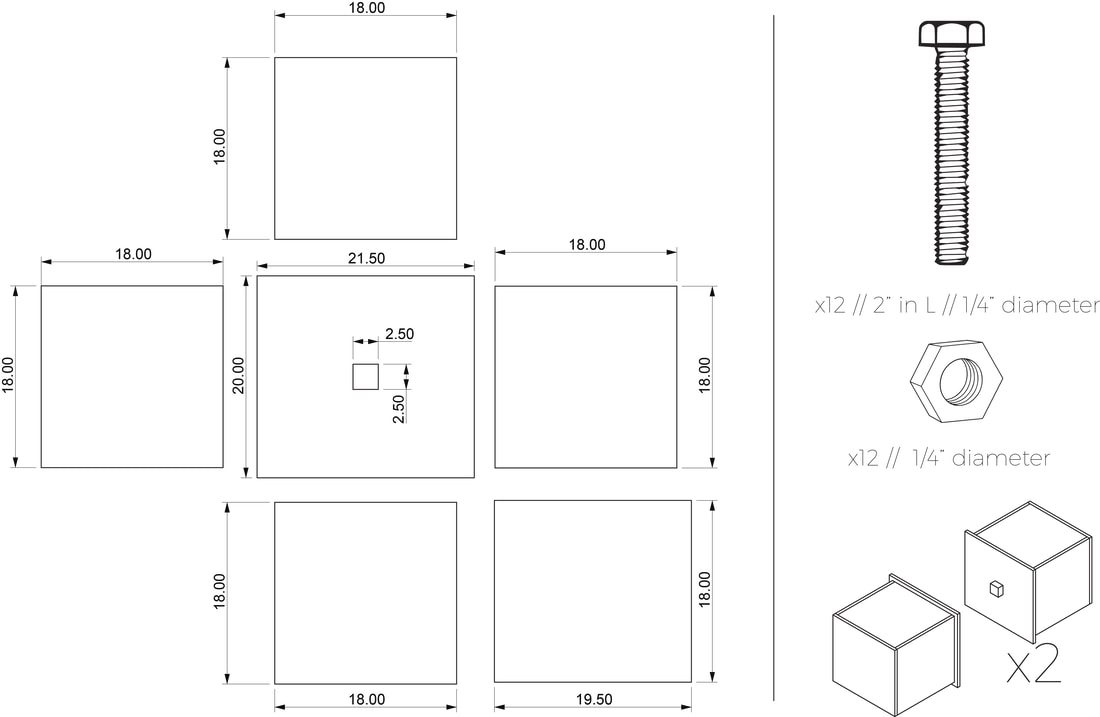
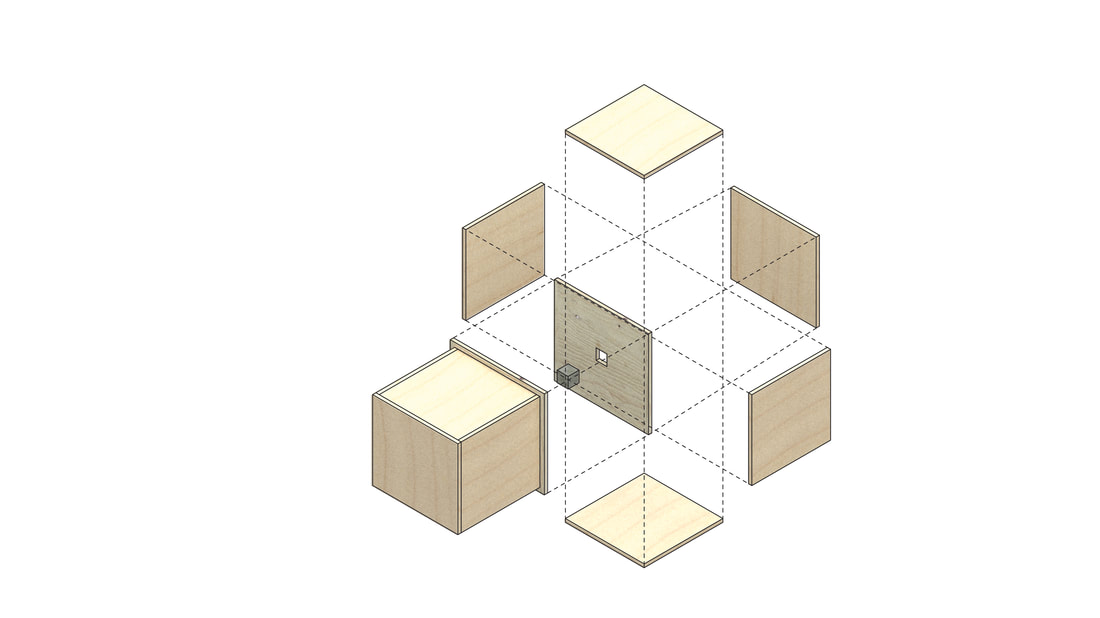
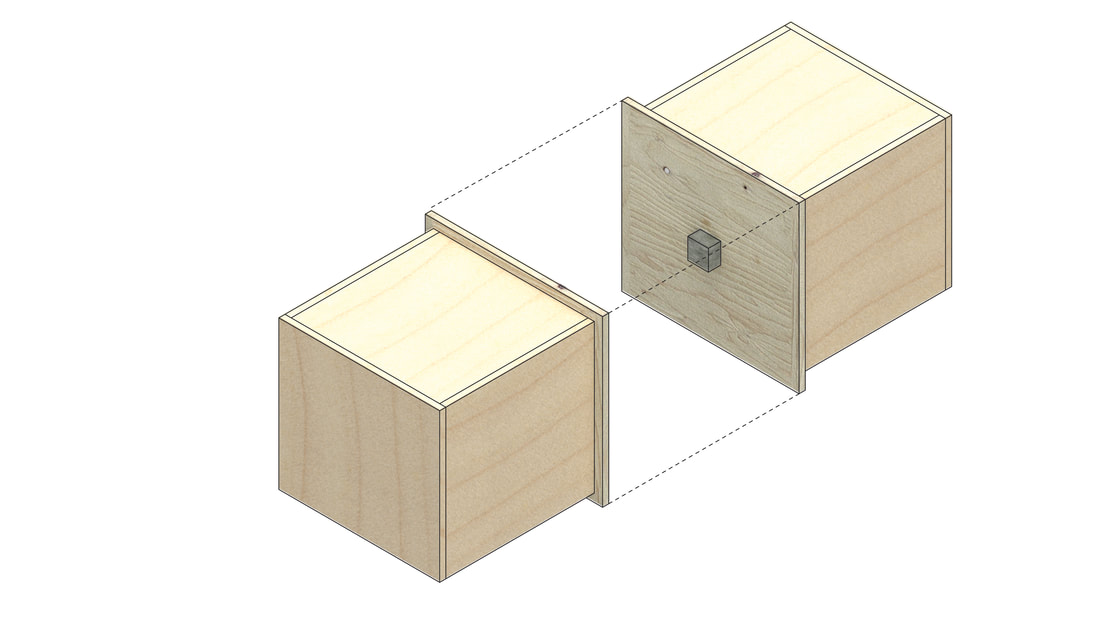
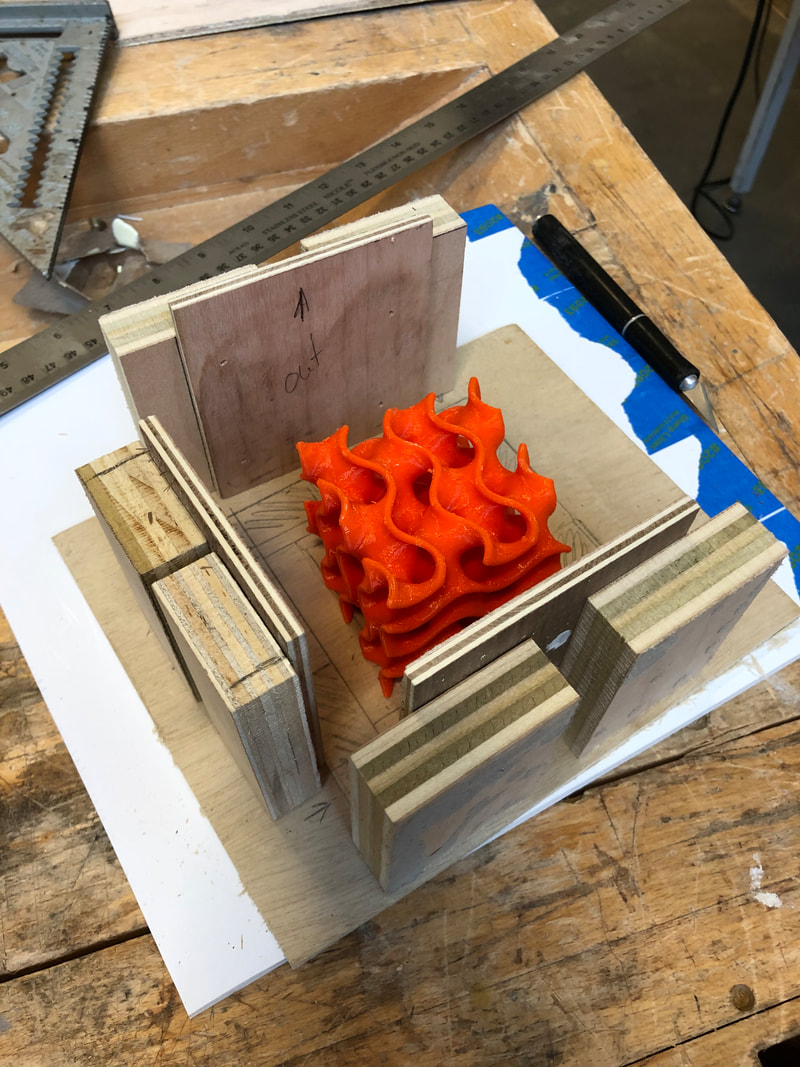
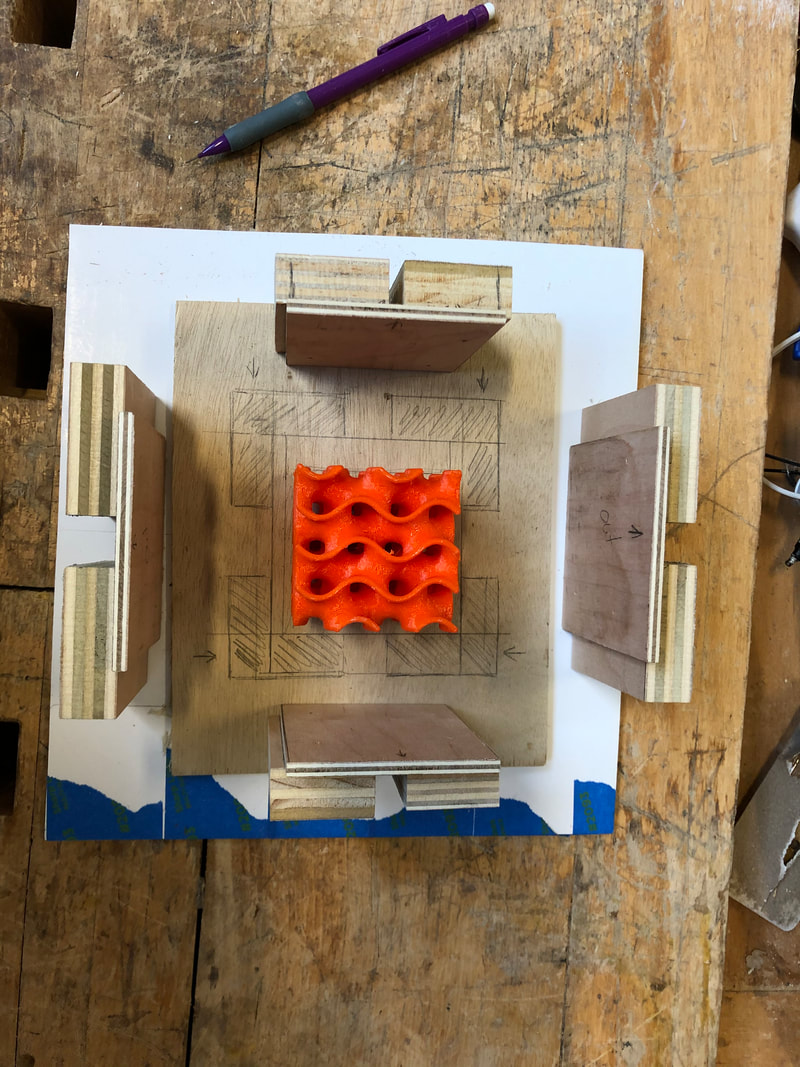
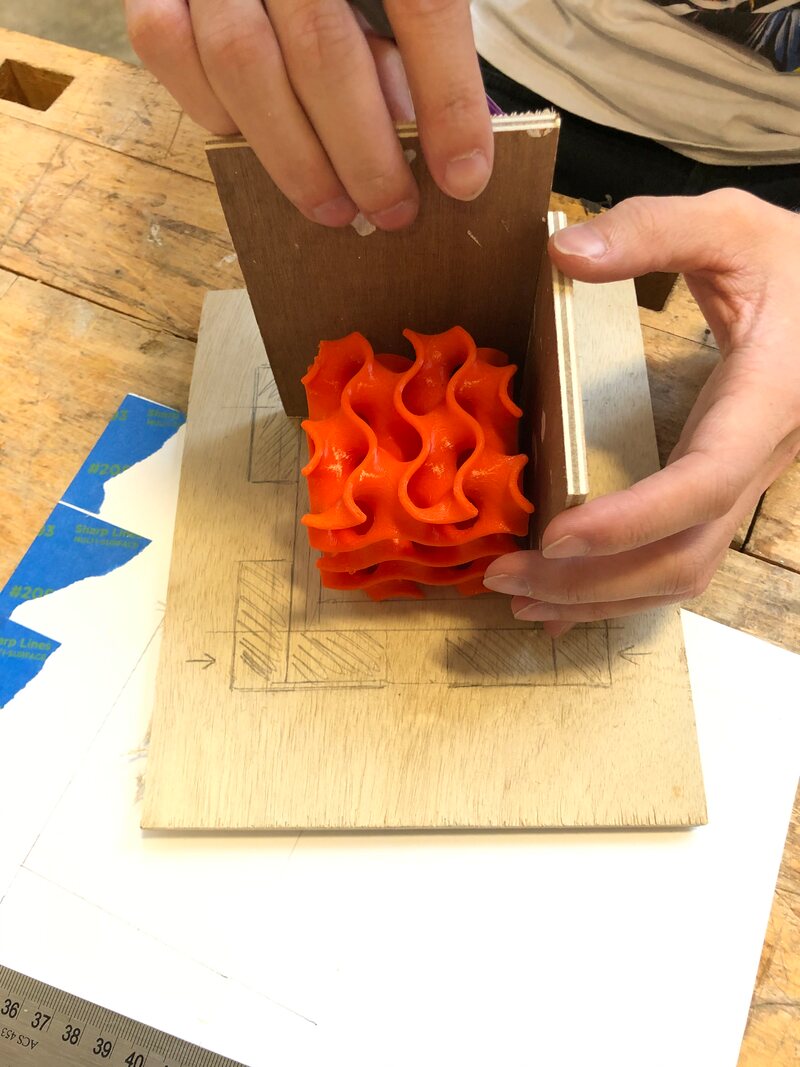
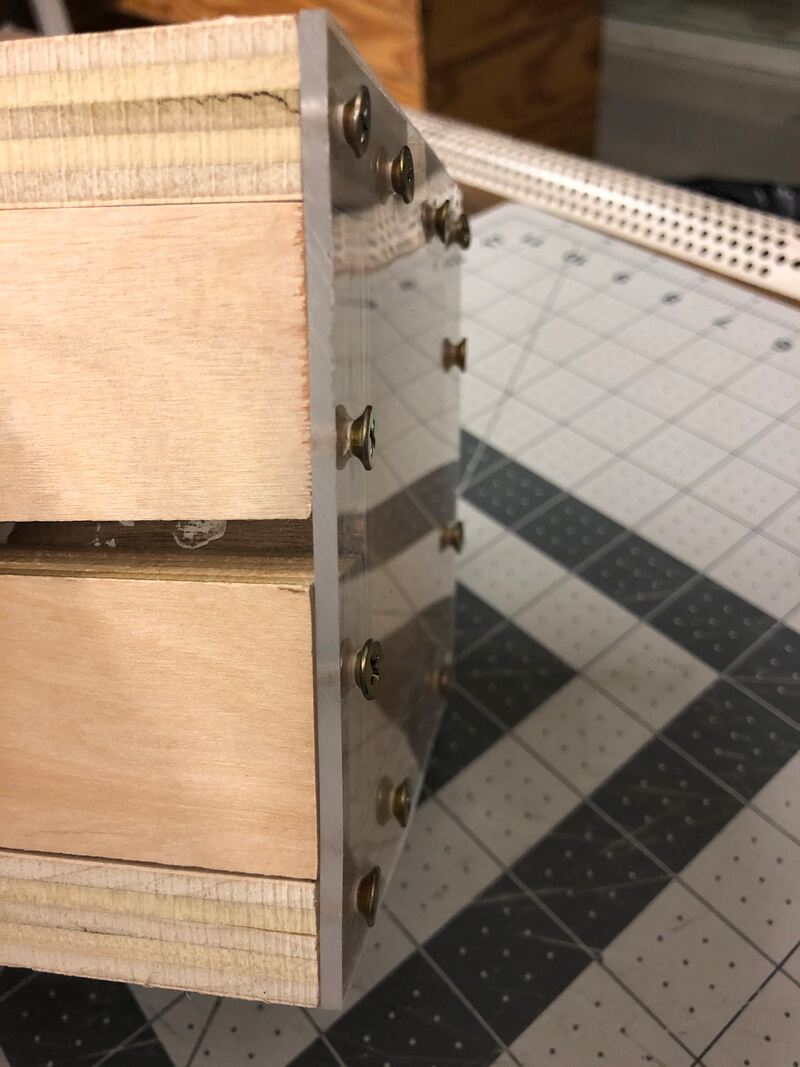
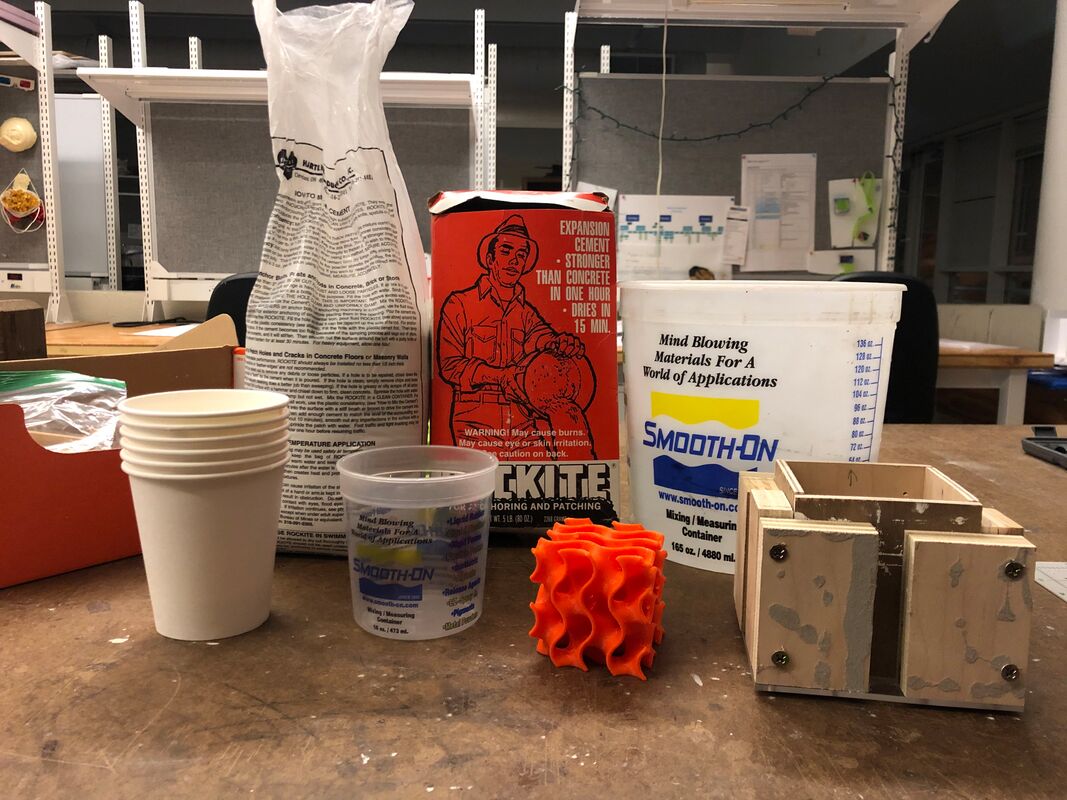
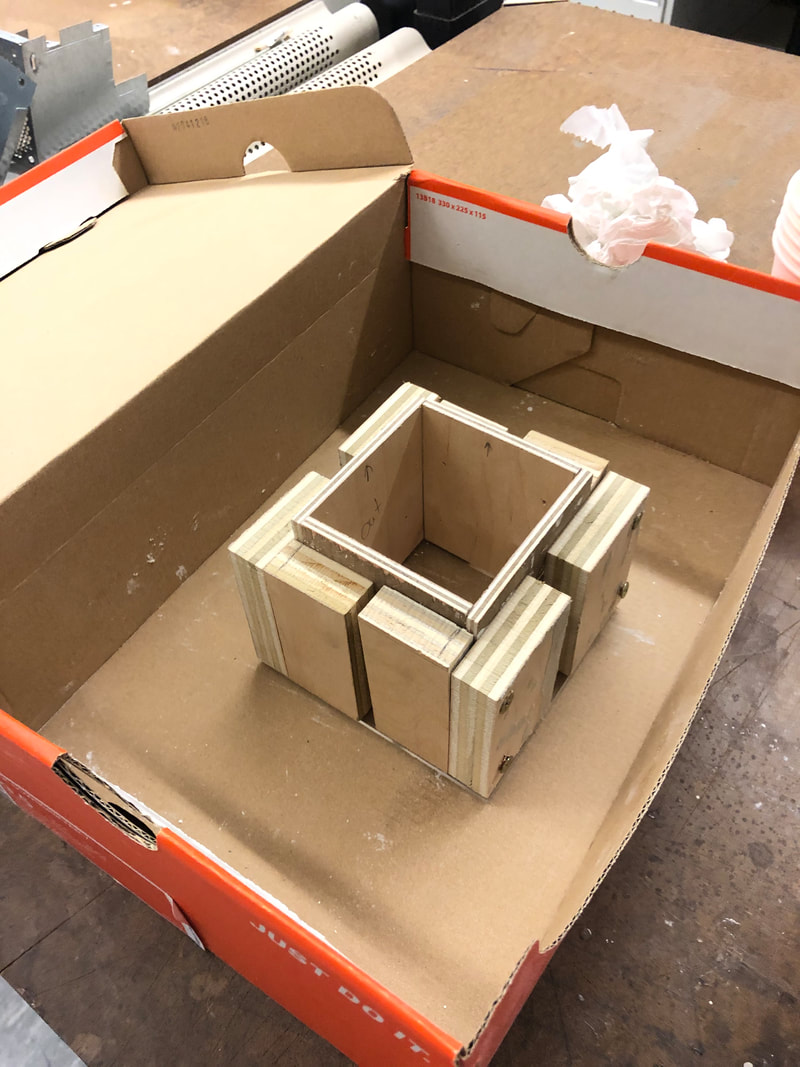
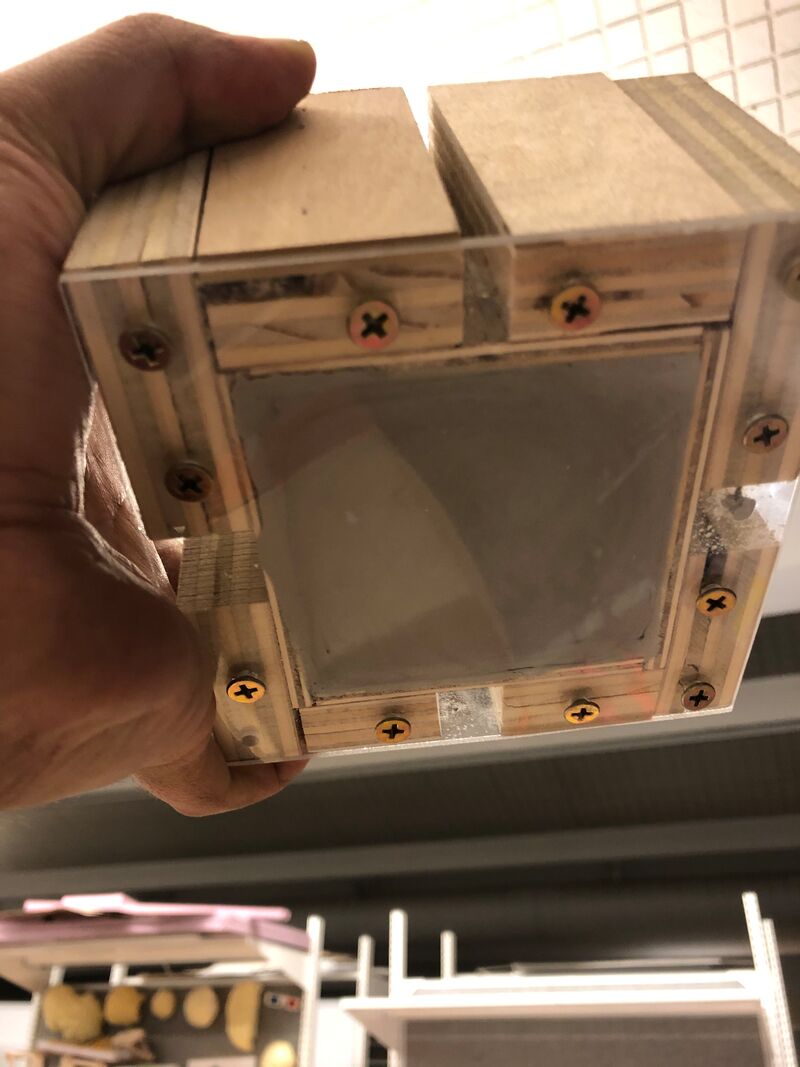
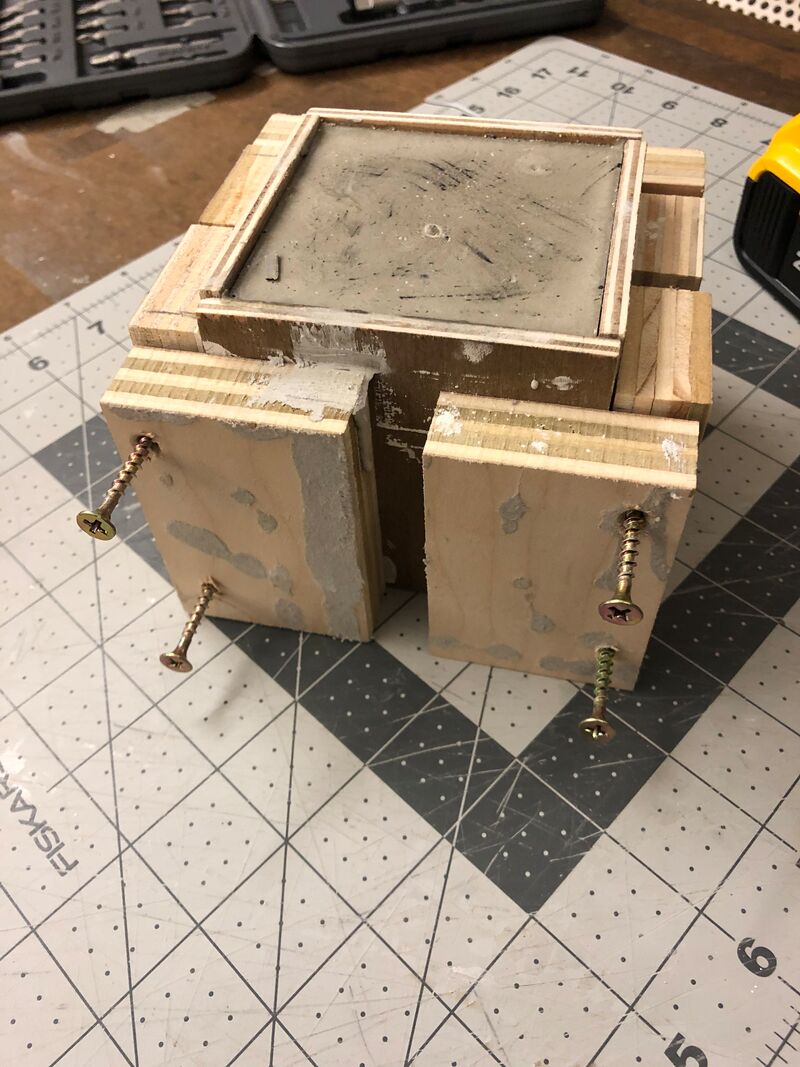
Concrete Form-work
We designed a form-work structure that could be used for several test pours. It consists of:
WE WILL ATTACH A DIGITAL FILE OF THE FORM-WORK
- -Plywood Base - or any flat surface
- -8 pieces of 3/4" plywood for bracing and panel attachment
- -four pieces of 1/4" plywood - used as wall panels
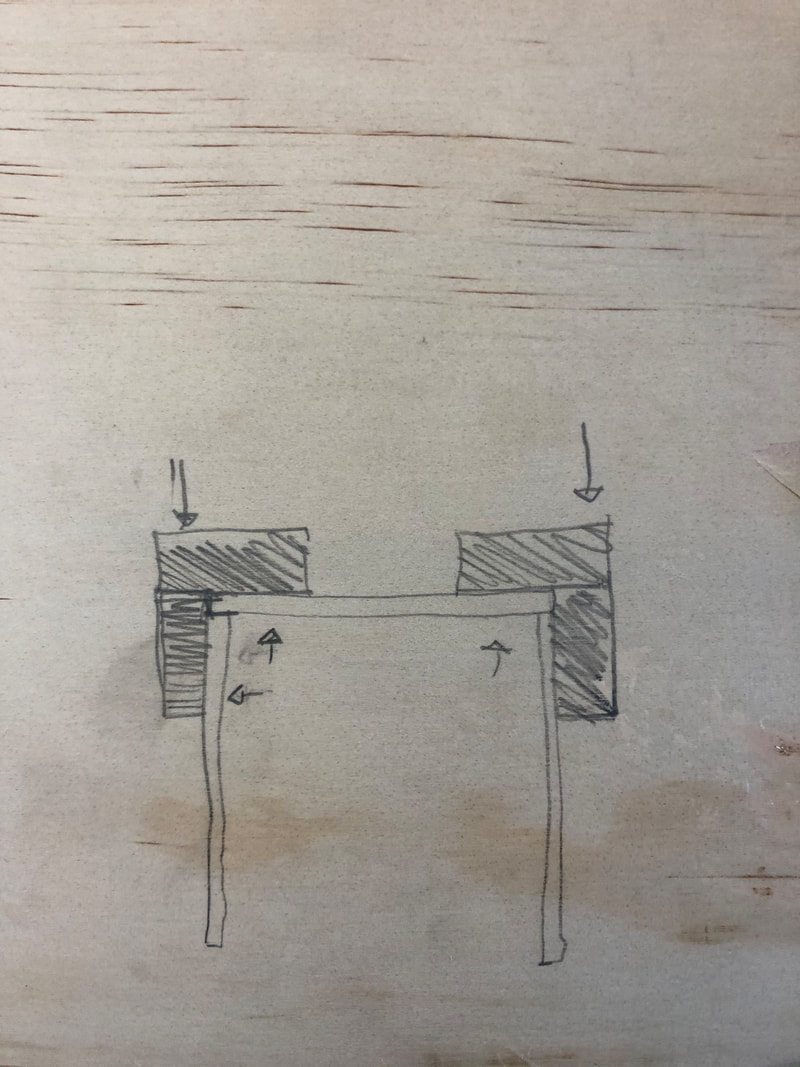
- Use a nail gun to fasten the 3/4" pieces to the 1/4" plywood.
- There will be a short side and a long side.
- The Short side will take into consideration the adjacent 1/4" plywood dimension. (Corner detail 1)
- The long side will take into consideration the adjacent 3/4" plywood dimension. (Corner detail 2)
- At the corners, drill holes so that the panels can be braced to one another. (This will create easy fastening and removal)
- Base will also be drilled so that it can be fastened to the 3/4" pieces.
WE WILL ATTACH A DIGITAL FILE OF THE FORM-WORK

|
|
Concrete Pour - GYROID- 2/xx/2020


Expectations:
Procedure:
Procedure:
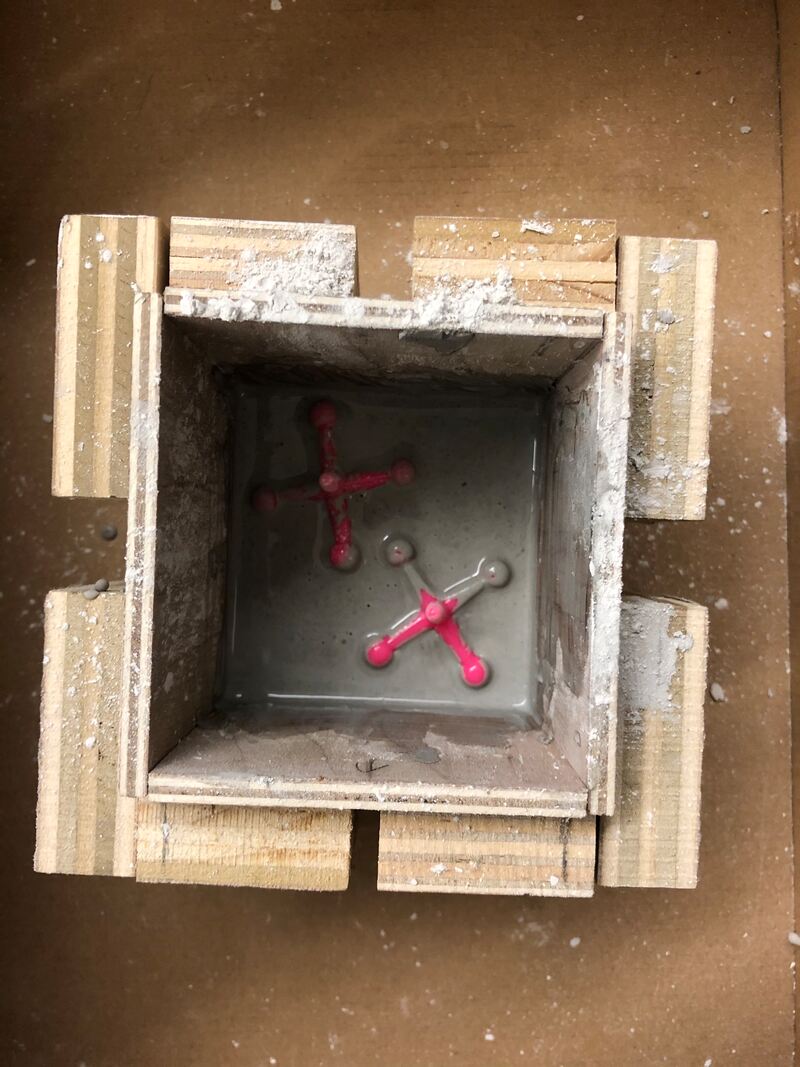
Concrete Pour - SILICONE JACKS- 2/xx/2020

Expectations:
Procedure:
Procedure:


3D-Printing Process - SILICONE JACKS- 3/xx/2020
Testing Concrete Stress Under Normal Conditions :
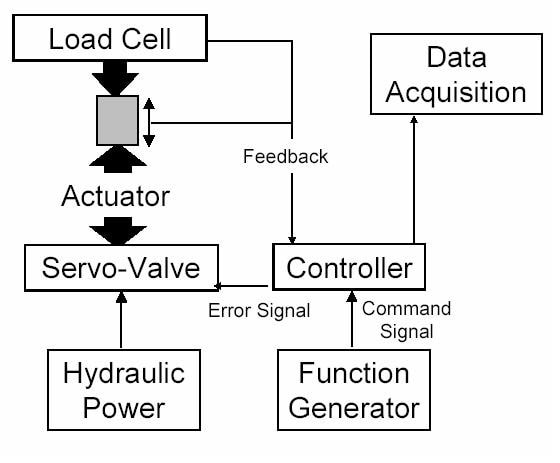
"A displacement controlled test is possible using a machine with a servo valve, in a closed loop. As shown in the schematic diagram in Figure 5, the machine compresses the concrete specimen at a constant displacement rate of the specimen – the LVDT on the specimen provides feedback to the controller, which then indicates to the servo valve the degree of piston movement to be provided (to keep the specimen displacement constant). In this way, the load response of the specimen is continuously studied as it undergoes incremental displacements. Failure occurs when the cracks in the specimen grow to an ‘unstable’ size."
Prof. Jason Weiss, School of Civil Engineering, Purdue University
Prof. Jason Weiss, School of Civil Engineering, Purdue University
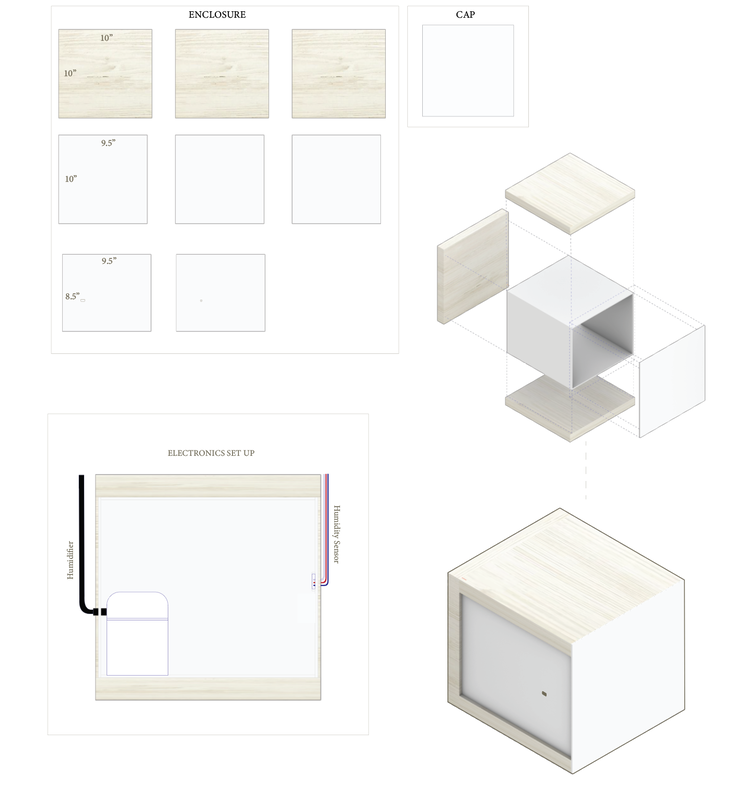
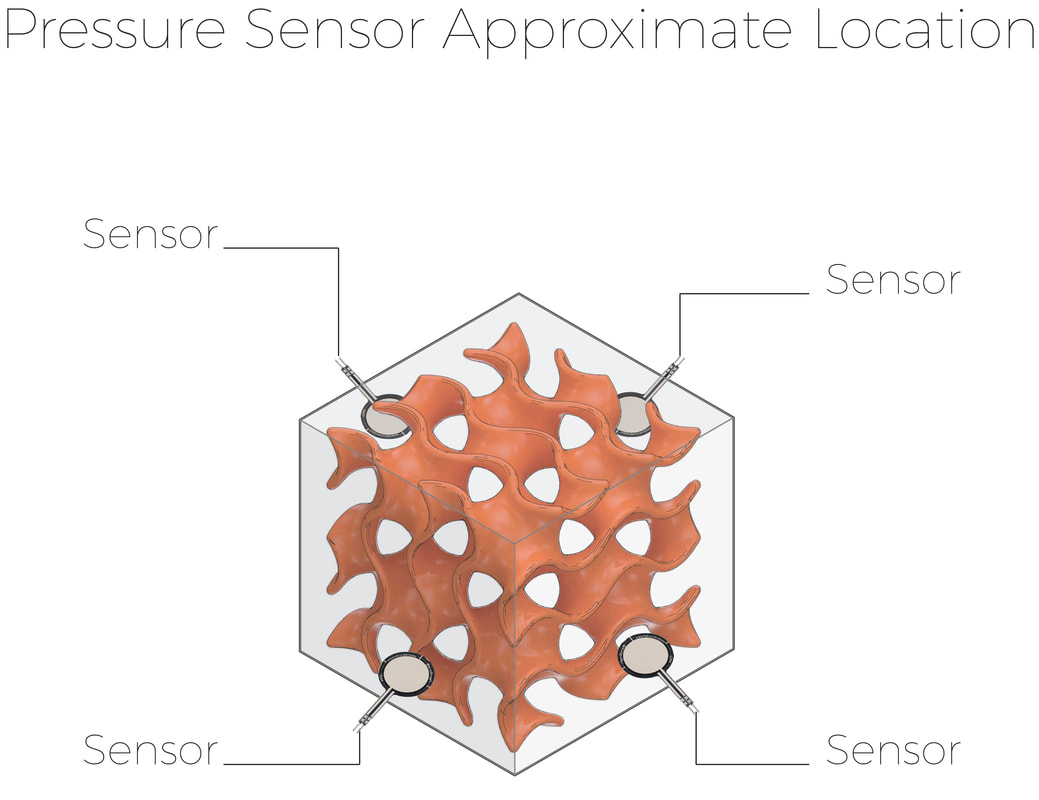
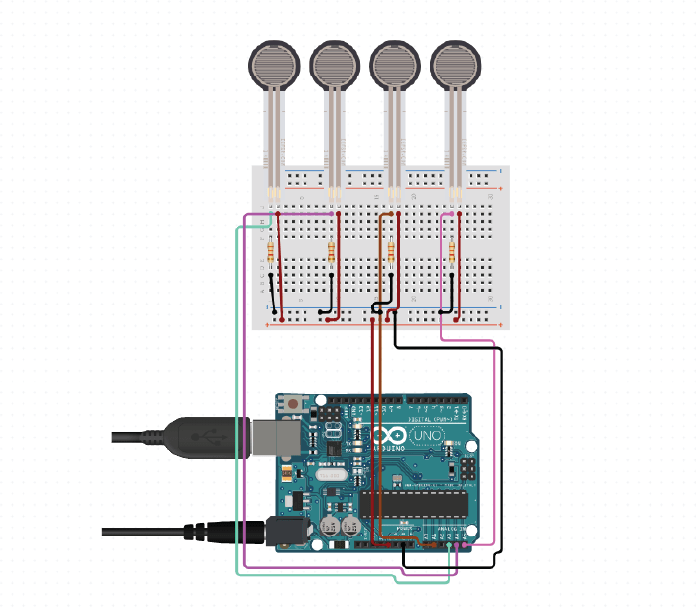
Electronics : Pressure Pad - 3/xx/2020
The use of pressure sensors would allow us to mimic an actual pressure test. The approach is economic in the sense that it can be constructed anywhere with very cheap components. The data collected from the pressure sensors would be constant, allowing us to "hypothetically" track the stress load on concrete cubes. Additionally, if there were to be any breaks internally, the sensors would be able to track the pressure change.
https://pimylifeup.com/arduino-force-sensing-resistor/?jwsource=cl

// Include Libraries
#include "Arduino.h"
#include "FSR.h"
// Pin Definitions
#define FSR_1_PIN_1 A3
#define FSR_2_PIN_1 A4
#define FSR_3_PIN_1 A1
#define FSR_4_PIN_1 A5
// Global variables and defines
// object initialization
FSR fsr_1(FSR_1_PIN_1);
FSR fsr_2(FSR_2_PIN_1);
FSR fsr_3(FSR_3_PIN_1);
FSR fsr_4(FSR_4_PIN_1);
// define vars for testing menu
const int timeout = 10000; //define timeout of 10 sec
char menuOption = 0;
long time0;
// Setup the essentials for your circuit to work. It runs first every time your circuit is powered with electricity.
void setup()
{
// Setup Serial which is useful for debugging
// Use the Serial Monitor to view printed messages
Serial.begin(9600);
while (!Serial) ; // wait for serial port to connect. Needed for native USB
Serial.println("start");
menuOption = menu();
}
// Main logic of your circuit. It defines the interaction between the components you selected. After setup, it runs over and over again, in an eternal loop.
void loop()
{
if(menuOption == '1') {
// Force Sensitive Resistor 0.5'' #1 - Test Code
// Read FSR resistance value. try also fsr_1.getResistance()
// For more information see Sparkfun website - www.sparkfun.com/products/9375
// Note, the default Vcc and external resistor values for FSR calculations are 5V ang 3300Okm, if you are not
// using these default valuse in your circuit go to FSR.cpp and change default values in FSR constructor
float fsr_1Force = fsr_1.getForce();
Serial.print(F("Force: ")); Serial.print(fsr_1Force); Serial.println(F(" [g]"));
}
else if(menuOption == '2') {
// Force Sensitive Resistor 0.5'' #2 - Test Code
// Read FSR resistance value. try also fsr_2.getResistance()
// For more information see Sparkfun website - www.sparkfun.com/products/9375
// Note, the default Vcc and external resistor values for FSR calculations are 5V ang 3300Okm, if you are not
// using these default valuse in your circuit go to FSR.cpp and change default values in FSR constructor
float fsr_2Force = fsr_2.getForce();
Serial.print(F("Force: ")); Serial.print(fsr_2Force); Serial.println(F(" [g]"));
}
else if(menuOption == '3') {
// Force Sensitive Resistor 0.5'' #3 - Test Code
// Read FSR resistance value. try also fsr_3.getResistance()
// For more information see Sparkfun website - www.sparkfun.com/products/9375
// Note, the default Vcc and external resistor values for FSR calculations are 5V ang 3300Okm, if you are not
// using these default valuse in your circuit go to FSR.cpp and change default values in FSR constructor
float fsr_3Force = fsr_3.getForce();
Serial.print(F("Force: ")); Serial.print(fsr_3Force); Serial.println(F(" [g]"));
}
else if(menuOption == '4') {
// Force Sensitive Resistor 0.5'' #4 - Test Code
// Read FSR resistance value. try also fsr_4.getResistance()
// For more information see Sparkfun website - www.sparkfun.com/products/9375
// Note, the default Vcc and external resistor values for FSR calculations are 5V ang 3300Okm, if you are not
// using these default valuse in your circuit go to FSR.cpp and change default values in FSR constructor
float fsr_4Force = fsr_4.getForce();
Serial.print(F("Force: ")); Serial.print(fsr_4Force); Serial.println(F(" [g]"));
}
if (millis() - time0 > timeout)
{
menuOption = menu();
}
}
// Menu function for selecting the components to be tested
// Follow serial monitor for instrcutions
char menu()
{
Serial.println(F("\nWhich component would you like to test?"));
Serial.println(F("(1) Force Sensitive Resistor 0.5'' #1"));
Serial.println(F("(2) Force Sensitive Resistor 0.5'' #2"));
Serial.println(F("(3) Force Sensitive Resistor 0.5'' #3"));
Serial.println(F("(4) Force Sensitive Resistor 0.5'' #4"));
Serial.println(F("(menu) send anything else or press on board reset button\n"));
while (!Serial.available());
// Read data from serial monitor if received
while (Serial.available())
{
char c = Serial.read();
if (isAlphaNumeric(c))
{
if(c == '1')
Serial.println(F("Now Testing Force Sensitive Resistor 0.5'' #1"));
else if(c == '2')
Serial.println(F("Now Testing Force Sensitive Resistor 0.5'' #2"));
else if(c == '3')
Serial.println(F("Now Testing Force Sensitive Resistor 0.5'' #3"));
else if(c == '4')
Serial.println(F("Now Testing Force Sensitive Resistor 0.5'' #4"));
else
{
Serial.println(F("illegal input!"));
return 0;
}
time0 = millis();
return c;
}
}
}